Unity is an incredibly versatile game engine that allows developers to integrate a wide range of media into their projects. However, it lacks one of the most exciting features — the ability to render web content, such as HTML, CSS, and JavaScript, directly onto textures in a 3D scene. This technique opens up possibilities for creating dynamic, interactive elements in your Unity projects, such as in-game browsers, menus, chats, internal wiki, or live data displays.
To achieve this functionality in your project, you’ll need to integrate a web view into Unity. DotNetBrowser is a separate .NET library that is used to load and render web pages, and supports .NET Standard 2.0, so it can be integrated into Unity.
In this article, we’ll describe how to render web content as a texture in Unity3D using DotNetBrowser.
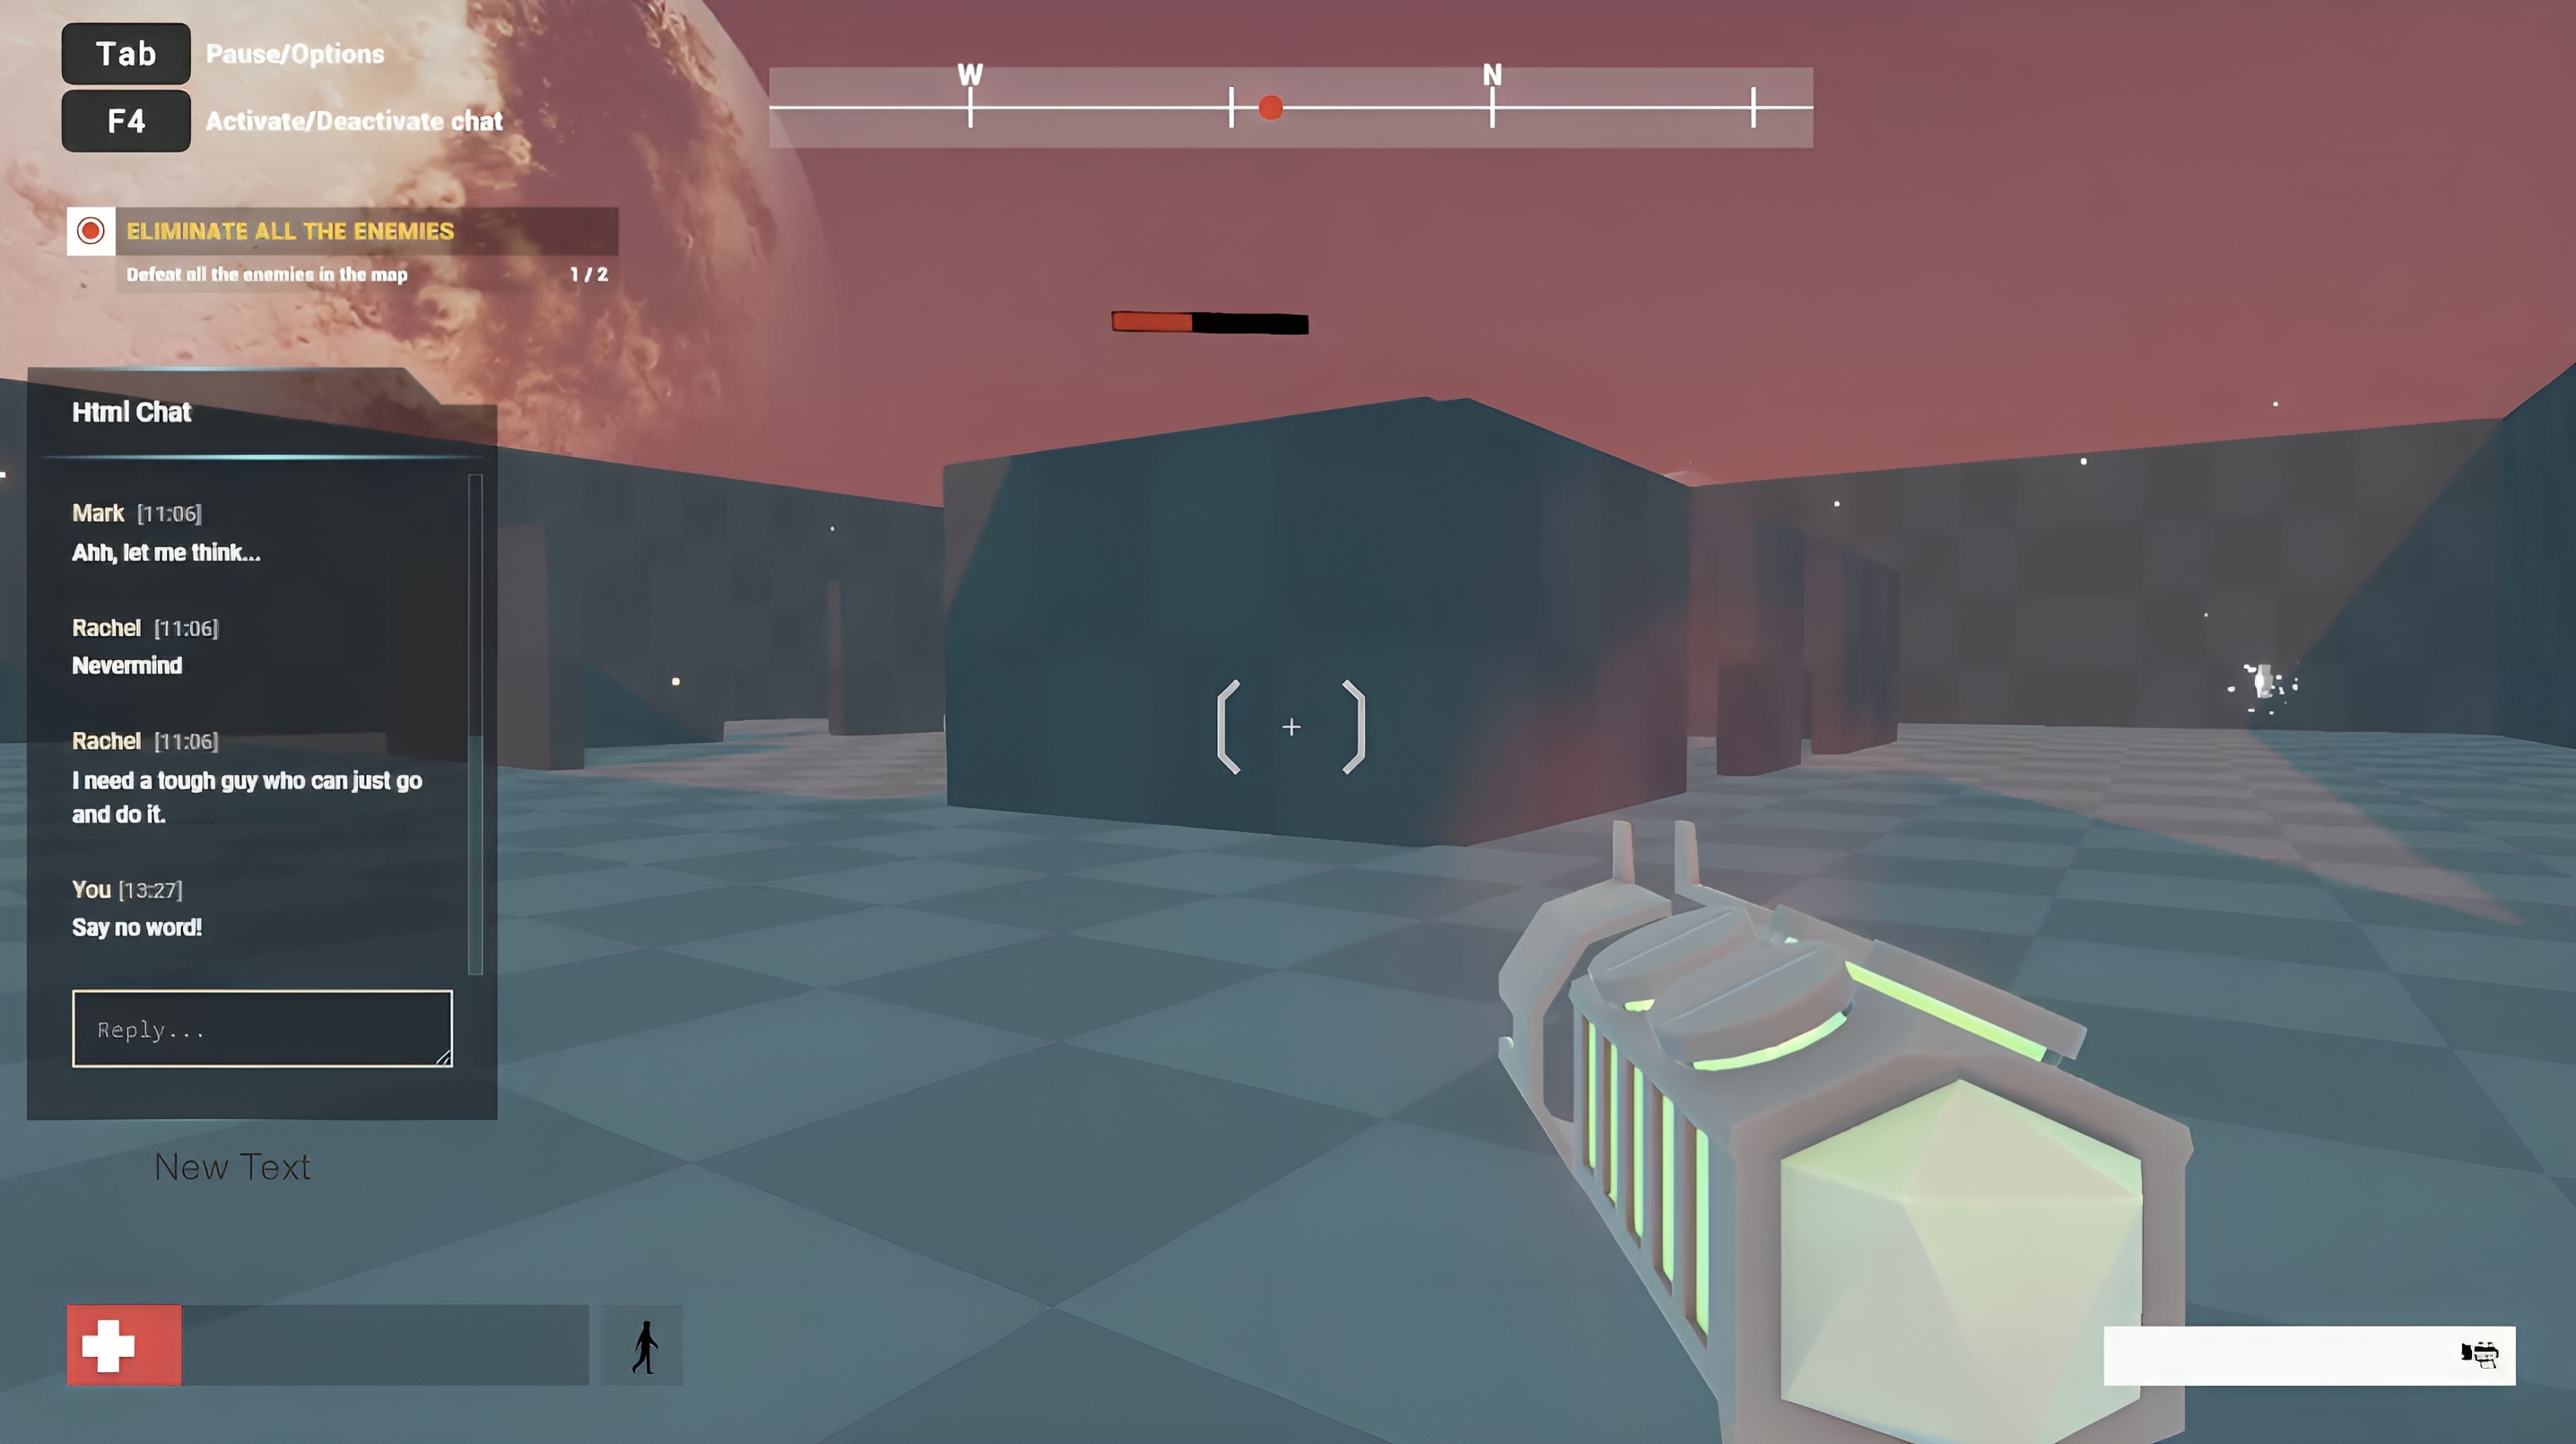
HTML chat and game menu in the project based on the FPS Microgame template.
Set up your Unity project
First, ensure your Unity environment is set up and ready to use. Open Unity Hub and create a new 3D project for Windows, macOS, or Linux.
Install DotNetBrowser
To install DotNetBrowser dependencies as a package, do the following:
In the Unity Editor top menu, click the “Window → Package Manager” menu item to open the Package Manager.
In the Package Manager window, click the “+” button in its top left corner, and select “Install package from git URL…” menu item.
Paste the package URL given below, and press the “Install” button.
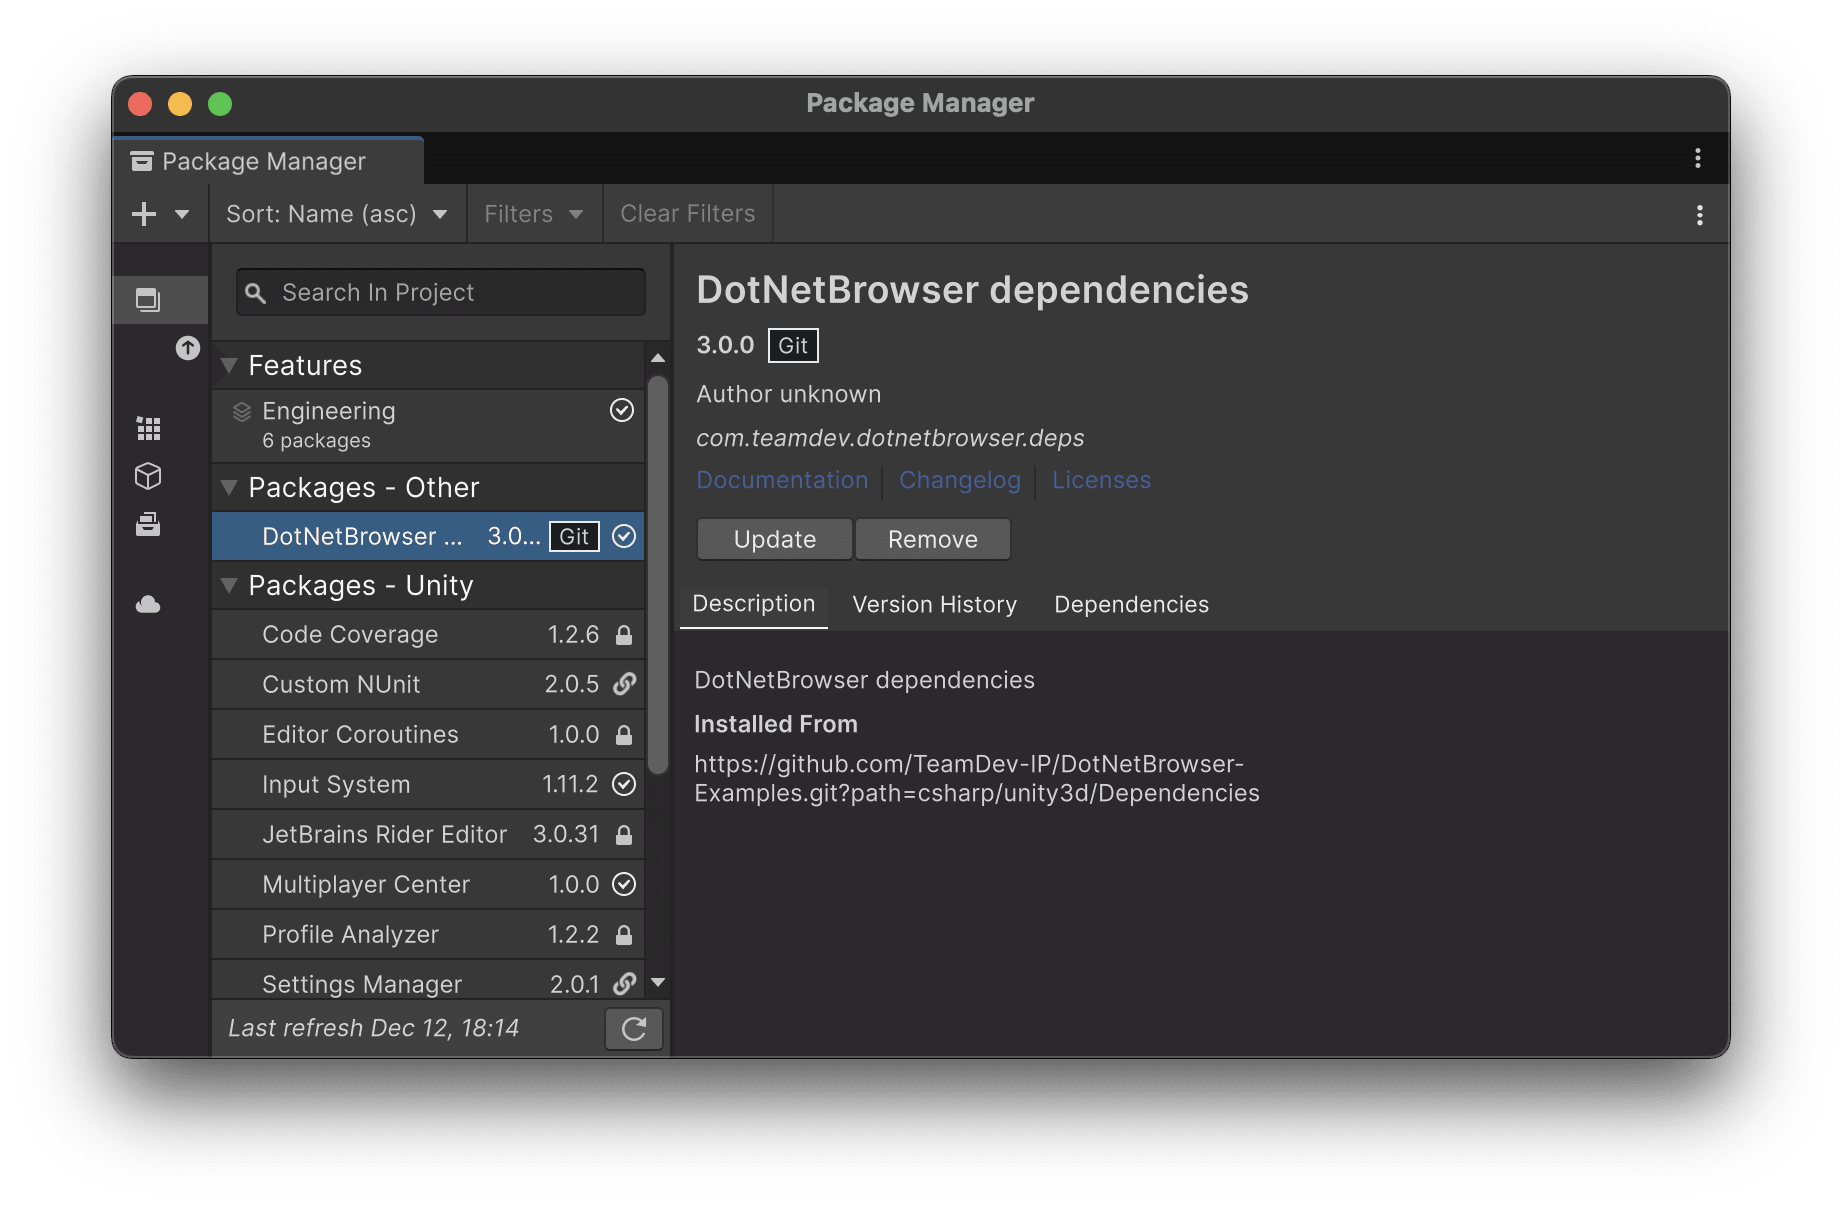
https://github.com/TeamDev-IP/DotNetBrowser-Examples.git?path=csharp/unity3d/DependenciesWait until the package is installed and DotNetBrowser dependencies are restored. The installed package should look like this:

The Package Manager with the DotNetBrowser dependencies package installed.
Close the Package Manager. You’re done with this step.
Create a material to display the web texture
Before rendering web content onto the 3D object, you need to create a material that will display the web page as a texture.
- Create a new material:
- Right-click in the “Assets” folder, select “Create → Material”, and name it something like “WebTextureMaterial”.
- Set the shader with a texture for it. The “Unlit/Texture” shader will suit our task.
- Set “Tiling X” equal to -1. It is necessary because Chromium sends
the pixel data inverted by X.

The WebTextureMaterial with "Tiling X" set to -1.
- Create a plane:
- Add a plane to the scene. You can do this by going to the top menu and selecting “GameObject → 3D Object → Plane”.
- Face it to the scene camera.
- Drag the material onto the plane. This material will display the web content.
Render web content to texture
Now, you need to render the web page or HTML content to a texture that can be applied to the material.
- Create a script to handle web content. Create a new C# script (right-click
in “Assets → Create → Empty C# Script” and name it
BrowserScript). - Write the code to load and render web content. Here’s a sample script that initializes DotNetBrowser for rendering a web page on a texture:
using DotNetBrowser.Browser;
using DotNetBrowser.Browser.Widgets.Handlers;
using DotNetBrowser.Engine;
using DotNetBrowser.Geometry;
using DotNetBrowser.Handlers;
using DotNetBrowser.Ui;
using UnityEngine;
using Color = DotNetBrowser.Ui.Color;

namespace Assets.Scripts
{
    public class BrowserScript : MonoBehaviour
    {
        private Texture2D texture;

        // The URL to render.
        public string DefaultUrl = "https://html5test.teamdev.com";

        // The default browser width.
        public uint Width = 1024;
        // The default browser height.
        public uint Height = 768;

        // The latest rendered bitmap data of the browser web page.
        public Bitmap Bitmap { get; private set; }
        // An instance of IBrowser controlled by this script.
        public IBrowser Browser { get; private set; }
        // An instance of IEngine controlled by this script.
        public IEngine Engine { get; private set; }

        public void Awake()
        {
            // Initialize the DotNetBrowser engine.
            EngineOptions engineOptions = new EngineOptions.Builder
            {
                LicenseKey = "your_license_key",
                RenderingMode = RenderingMode.OffScreen
            }.Build();
            Engine = EngineFactory.Create(engineOptions);

            // Create a browser instance.
            Browser = Engine.CreateBrowser();

            // Set the browser size and transparency.
            Browser.Size = new Size(Width, Height);
            Browser.Settings.TransparentBackgroundEnabled = true;
            Browser.Settings.DefaultBackgroundColor =
                new Color(0, 0, 0, 0);

            // Configure rendering the browser content
            // and save the rendered image.
            var provider = (IOffScreenRenderProvider)Browser;
            provider.PaintHandler = new Handler<PaintParameters>(p =>
                Bitmap = p.View);
            provider.Show();
        }

        public void OnDestroy() => Engine?.Dispose();

        public void Update()
        {
            if (Bitmap == null) return;

            int newWidth = (int)Bitmap.Size.Width;
            int newHeight = (int)Bitmap.Size.Height;
            if (texture == null || texture.width != newWidth
                || texture.height != newHeight)
            {
                texture = new Texture2D(newWidth, newHeight,
                    TextureFormat.BGRA32, true);
                var render = gameObject.GetComponent<MeshRenderer>();
                render.material.mainTexture = texture;
            }

            texture.SetPixelData((byte[])Bitmap.Pixels, 0);
            texture.Apply(true);
        }

        public void Start()
        {
            Browser.Navigation.LoadUrl(DefaultUrl);
        }
    }
}
After that, specify the correct license key in the EngineOptions.Builder. You
can get a free 30-day trial license. Fill out the form below, and you will
receive an email with the license key immediately.
Sending…
Sorry, the sending was interrupted
Please try again. If the issue persists, contact us at info@teamdev.com.
Your personal DotNetBrowser trial key and quick start guide will arrive in your Email Inbox in a few minutes.
Assign the script and test
Attach the script to the plane that you created earlier. With a script and material your Inspector pane for the plane should look like this:

The Inspector pane for the plane.
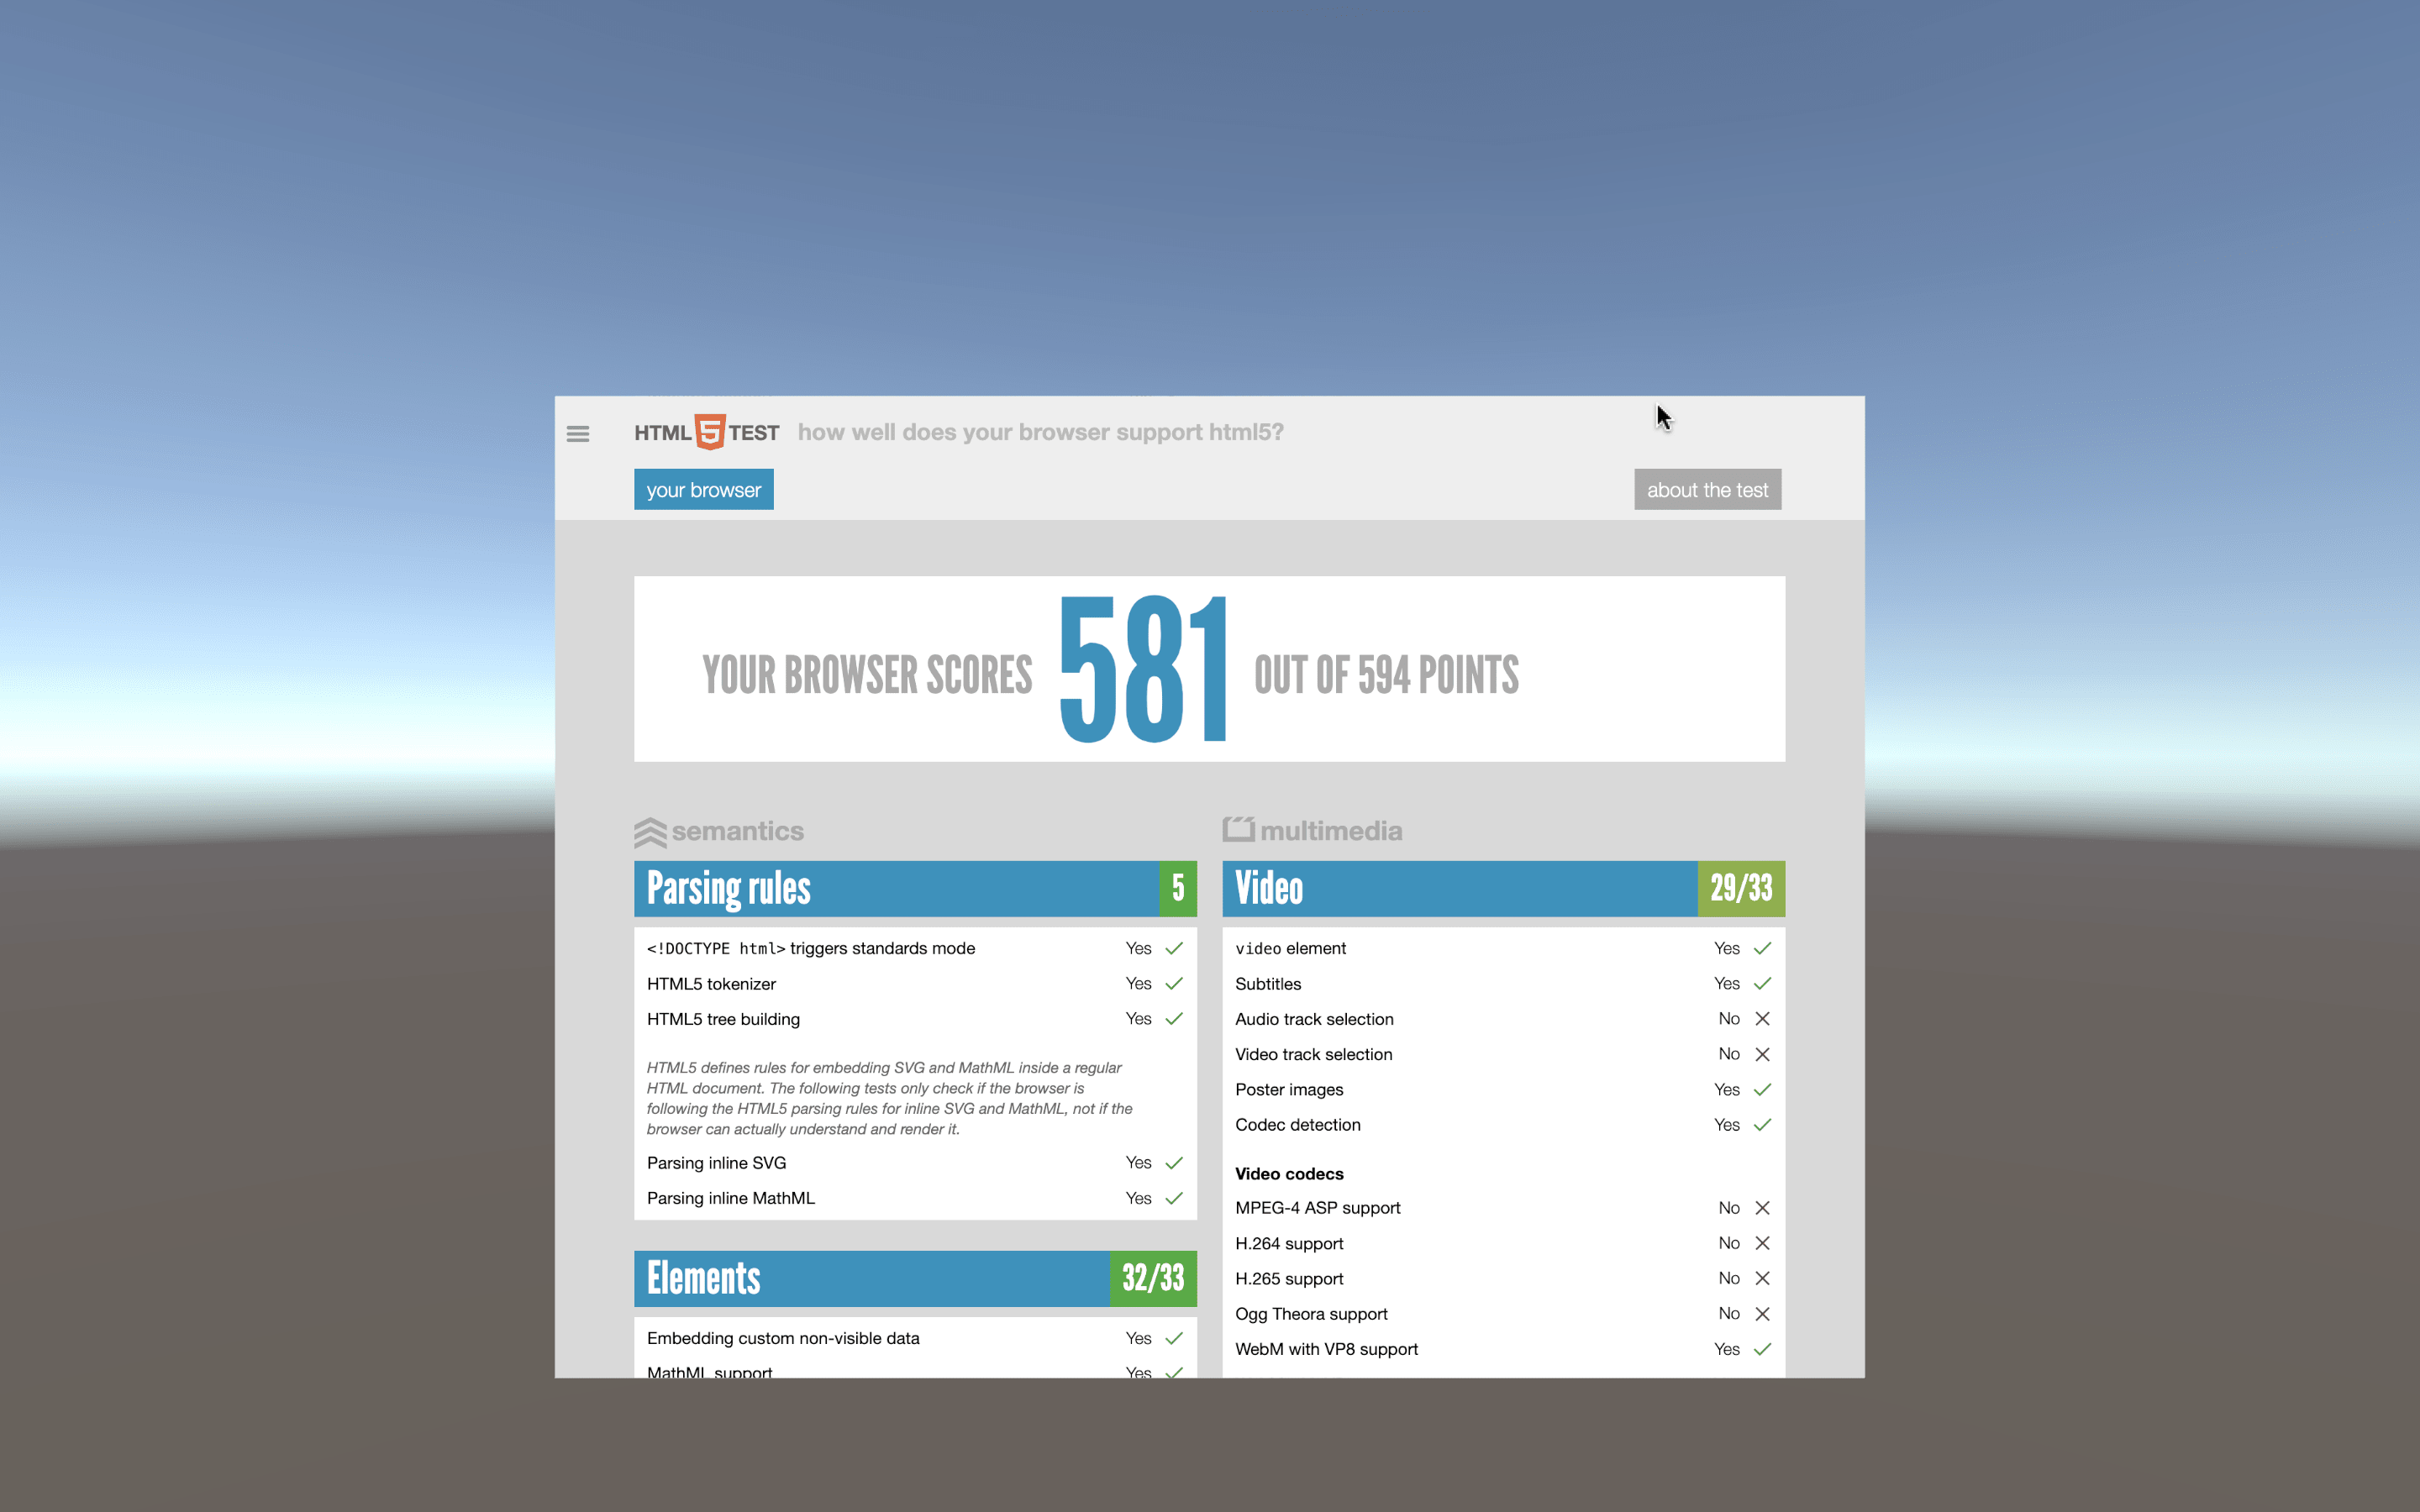
Play the scene in Unity. The web content should now be rendered on the material you applied to the plane. If you’ve done everything right you should see this:

The web content rendered on a plane in Unity.
Make web content interactive
You can further add interactivity to the web content. For example, you can let users interact with the web page by using a mouse or touch screen.
You may need to capture user clicks, mouse movements, or touch events to pass them to the web content for interaction.
The simplest way to capture mouse clicks in Unity is to add the OnMouseDown()
and OnMouseUp() methods to the BrowserScript:
// Get the current mouse point in browser coordinates.
private Point GetMousePoint()
{
    // Ensure the main camera exists on the scene.
    if (Camera.main != null)
    {
        // Create a ray from the camera's position
        // through the current mouse position on the screen.
        var ray = Camera.main.ScreenPointToRay(Input.mousePosition);

        // Perform a raycast to detect collision
        // with objects on the scene.
        if (Physics.Raycast(ray, out RaycastHit hit))
        {
            // Calculate the coordinates in the browser space.
            // Since "Tiling X" is -1, the X coordinate is inverted.
            int x = (int)(Width * (1 - hit.textureCoord.x));
            int y = (int)(Height * hit.textureCoord.y);

            return new Point(x, y);
        }
    }

    // Return null if no valid point could be calculated
    // (e.g., no camera or no raycast hit).
    return null;
}


// OnMouseDown is called when the user presses the mouse button
// while over the collider.
public void OnMouseDown()
{
    var location = GetMousePoint();
    if (location == null) return;
    var args = new MousePressedEventArgs
    {
        Location = location,
        // OnMouseDown is called for the left clicks only.
        Button = MouseButton.Left,
        ClickCount = 1
    };
    Browser.Mouse.Pressed.Raise(args);
}

public void OnMouseUp()
{
    var location = GetMousePoint();
    if (location == null) return;
    var args = new MouseReleasedEventArgs
    {
        Location = location,
        Button = MouseButton.Left,
        ClickCount = 1
    };
    Browser.Mouse.Released.Raise(args);
}
Unity provides a number of options for capturing user input, and DotNetBrowser has all the necessary APIs to pass keyboard, touch, and mouse events to the browser. You can check out the documentation about simulating input. You can also take a look at the complete example of DotNetBrowser in Unity3D, with the basic focus behavior, mouse, and keyboard interactions implemented.
Optimize performance
Rendering web content in Unity can be resource-intensive. To optimize the performance:
- Avoid rendering large browser images if they are unnecessary: The browser size is also the texture size, and large textures have an impact on the overall performance.
- Optimize web content: Ensure that the web page you’re rendering is optimized for quick loading and minimal resource usage.
- Adjust frame rate: Limit the frame rate or refresh rate of the browser rendering by preventing unnecessary texture updates. For instance, there is no need to update the texture pixels if the bitmap was not updated by DotNetBrowser.
Conclusion
Rendering web content onto a texture in Unity3D allows you to create in-game browsers, interactive web-based dashboards, or even live-streamed content. With the use of libraries like DotNetBrowser, it’s relatively easy to integrate web content directly into your Unity project. By following these steps, you can start experimenting with different web content, integrate it with Unity, and open up new possibilities for interactive 3D applications.
This guide gives you a solid foundation for displaying web content as textures in Unity. Whether you are building a virtual reality project, a game, or an interactive application, these techniques can significantly enhance the user experience.
