
To automate a web page from C# with DotNetBrowser, you usually go through its DOM API: find a field, set its value, and click a button. But many pages don’t react to a value that changes this way. They wait for the events a real user produces by typing and clicking. For example, a button can stay disabled until someone actually types in the field.
Simulating keyboard and mouse input solves this. The browser receives the same events that a real keyboard and mouse produce, so the page can’t tell the difference. This makes simulated input useful for automation: testing a web UI inside your desktop app, or filling forms in a legacy web app you can’t change.
In this article, we’ll build a small WPF application that types a task into a web page and clicks the button that adds it. We’ll build it twice, with DotNetBrowser and with CefSharp, so you can compare the code. At the end, we’ll look at what WebView2 offers for the same task.
What you’ll need
To follow along, you’ll need:
- Windows 10 or later.
- The .NET 8 SDK or later.
- A DotNetBrowser license key. The evaluation key is free for 30 days.
- The Visual C++ Redistributable 2022 (x64), which CefSharp needs; DotNetBrowser doesn’t.
Creating the web page
First, we need a page to automate: a bucket list with a text
field, an Add button, and the list. Create a folder for both
projects, for example BucketList, with a shared folder inside it. Save
this page in shared as bucket-list.html
<!DOCTYPE html>
<html lang="en">
<head>
  <meta charset="utf-8">
  <title>Bucket list</title>
</head>
<body>
  <h1>Bucket list</h1>
  <input id="task" type="text" placeholder="What do you want to do?" autofocus>
  <button id="add" disabled>Add</button>
  <ul id="list"></ul>
  <script>
    const input = document.getElementById('task');
    const addButton = document.getElementById('add');
    const list = document.getElementById('list');

    // The button is enabled by real input events, not by setting input.value.
    input.addEventListener('input', () => {
      addButton.disabled = input.value.trim() === '';
    });

    addButton.addEventListener('click', () => {
      const item = document.createElement('li');
      item.textContent = input.value.trim();
      list.appendChild(item);
      input.value = '';
      addButton.disabled = true;
      input.focus();
    });
  </script>
</body>
</html>
The Add button starts disabled, and only an input event enables
it. A click adds the task to the list, clears the field, and
puts the cursor back in it.
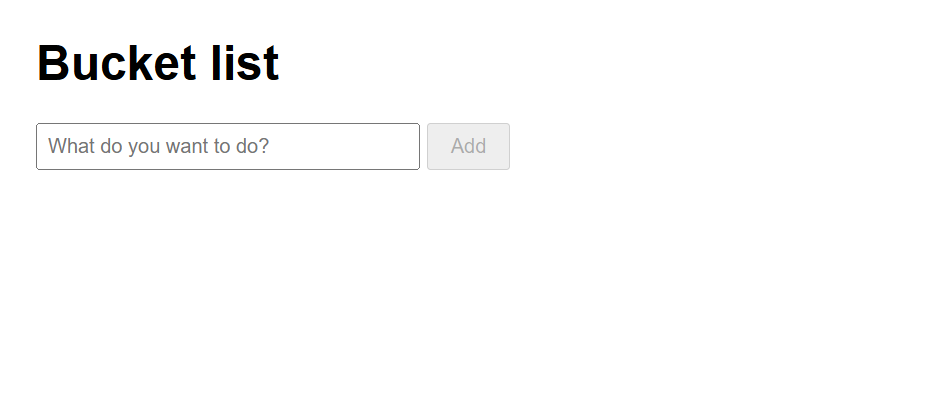
The page before any input.
Creating the applications
Now we’ll create the two applications. Each is a WPF application with one window: the browser on top and two buttons below. Type task types text into the field, and Click Add clicks the button on the page.
DotNetBrowser project
DotNetBrowser is a Chromium-based web view for .NET. First, create
the project in the BucketList folder and add
the DotNetBrowser.Wpf package, which pulls in the other
DotNetBrowser packages:
dotnet new wpf -o DotNetBrowserApp
dotnet add DotNetBrowserApp package DotNetBrowser.Wpf
Then add this to DotNetBrowserApp.csproj to copy the page to
the output directory:
<ItemGroup>
  <None Include="..\shared\bucket-list.html" Link="bucket-list.html">
    <CopyToOutputDirectory>PreserveNewest</CopyToOutputDirectory>
  </None>
</ItemGroup>
Replace the contents of MainWindow.xaml:
<Window x:Class="DotNetBrowserApp.MainWindow"
        xmlns="http://schemas.microsoft.com/winfx/2006/xaml/presentation"
        xmlns:x="http://schemas.microsoft.com/winfx/2006/xaml"
        xmlns:wpf="clr-namespace:DotNetBrowser.Wpf;assembly=DotNetBrowser.Wpf"
        Title="Bucket list — DotNetBrowser" Height="480" Width="640"
        Closed="Window_Closed">
    <DockPanel>
        <StackPanel DockPanel.Dock="Bottom" Orientation="Horizontal"
                    HorizontalAlignment="Center" Margin="8">
            <Button Content="Type task" Width="120" Margin="4"
                    Click="TypeTask_Click" />
            <Button Content="Click Add" Width="120" Margin="4"
                    Click="ClickAdd_Click" />
        </StackPanel>
        <wpf:BrowserView Name="browserView" />
    </DockPanel>
</Window>
Replace the contents of MainWindow.xaml.cs. The constructor creates
the engine and the browser, attaches the browser to
the view, and loads the page. The XAML refers to two button
handlers that don’t exist yet, so the project won’t build until we add them
in the next sections:
using System;
using System.IO;
using System.Windows;
using DotNetBrowser.Browser;
using DotNetBrowser.Engine;

namespace DotNetBrowserApp
{
    public partial class MainWindow : Window
    {
        private readonly IEngine engine;
        private readonly IBrowser browser;

        public MainWindow()
        {
            engine = EngineFactory.Create(new EngineOptions.Builder
            {
                RenderingMode = RenderingMode.HardwareAccelerated,
                LicenseKey = "<your_license_key>"
            }.Build());
            browser = engine.CreateBrowser();

            InitializeComponent();
            browserView.InitializeFrom(browser);

            string page = Path.Combine(AppContext.BaseDirectory,
                                       "bucket-list.html");
            browser.Navigation.LoadUrl(page);
        }

        private void Window_Closed(object sender, EventArgs e)
        {
            browser.Dispose();
            engine.Dispose();
        }
    }
}
We set the rendering mode to hardware-accelerated so Chromium draws the page directly in the window; the engine guide explains the other mode, off-screen rendering.
Replace <your_license_key> with your key. For other ways to set it, such as
a license file, see the license guide.
CefSharp project
Now we do the same for CefSharp, the open-source .NET wrapper for
the Chromium Embedded Framework. From the BucketList folder, create
the second project:
dotnet new wpf -o CefSharpApp
dotnet add CefSharpApp package CefSharp.Wpf.NETCore
CefSharp ships separate native binaries for each architecture, so
the project must choose one. Add the platform and the page to
CefSharpApp.csproj:
<PropertyGroup>
  <PlatformTarget>x64</PlatformTarget>
  <RuntimeIdentifier>win-x64</RuntimeIdentifier>
  <SelfContained>false</SelfContained>
</PropertyGroup>
<ItemGroup>
  <None Include="..\shared\bucket-list.html" Link="bucket-list.html">
    <CopyToOutputDirectory>PreserveNewest</CopyToOutputDirectory>
  </None>
</ItemGroup>
The window is the same apart from the highlighted lines;
the differences that matter are ChromiumWebBrowser instead of
BrowserView and no Closed handler. Replace the contents of
MainWindow.xaml:
<Window x:Class="CefSharpApp.MainWindow"
        xmlns="http://schemas.microsoft.com/winfx/2006/xaml/presentation"
        xmlns:x="http://schemas.microsoft.com/winfx/2006/xaml"
        xmlns:cef="clr-namespace:CefSharp.Wpf;assembly=CefSharp.Wpf"
        Title="Bucket list — CefSharp" Height="480" Width="640">
    <DockPanel>
        <StackPanel DockPanel.Dock="Bottom" Orientation="Horizontal"
                    HorizontalAlignment="Center" Margin="8">
            <Button Content="Type task" Width="120" Margin="4"
                    Click="TypeTask_Click" />
            <Button Content="Click Add" Width="120" Margin="4"
                    Click="ClickAdd_Click" />
        </StackPanel>
        <cef:ChromiumWebBrowser Name="browser" />
    </DockPanel>
</Window>
CefSharp starts Chromium when the first browser control is created and
shuts it down when the application exits, so the constructor only
loads the page. Replace the contents of MainWindow.xaml.cs:
using System;
using System.Collections.Generic;
using System.IO;
using System.Windows;
using CefSharp;

namespace CefSharpApp
{
    public partial class MainWindow : Window
    {
        public MainWindow()
        {
            InitializeComponent();

            string page = Path.Combine(AppContext.BaseDirectory,
                                       "bucket-list.html");
            browser.Address = new Uri(page).AbsoluteUri;
        }
    }
}
Simulating keyboard input
With the windows in place, we can make the buttons work, starting with
Type task. For each character, a keyboard produces three events: key
pressed, character typed, and key released. The page sees them as
keydown, keypress, and keyup, and the inserted character also fires
input. To simulate typing, we raise the same three events. Unlike events
dispatched from JavaScript, which have isTrusted set to false, these are
trusted, so pages treat them like real input.
In DotNetBrowser, IBrowser.Keyboard has the KeyPressed, KeyTyped, and
KeyReleased events, and each has a Raise() method. Add
the namespaces to the DotNetBrowser MainWindow.xaml.cs:
using DotNetBrowser.Input.Keyboard;
using DotNetBrowser.Input.Keyboard.Events;
Then add the handler and a helper to the class:
private void TypeTask_Click(object sender, RoutedEventArgs e)
{
    browser.Focus();
    browser.MainFrame.Document.GetElementById("task").Focus();
    TypeText(browser.Keyboard, "Learn to surf");
}

private static void TypeText(IKeyboard keyboard, string text)
{
    foreach (char c in text)
    {
        // Key codes of letters, digits, and space equal their
        // uppercase character codes.
        KeyCode key = (KeyCode)char.ToUpperInvariant(c);
        string keyChar = c.ToString();
        KeyModifiers modifiers = new KeyModifiers
        {
            ShiftDown = char.IsUpper(c)
        };

        keyboard.KeyPressed.Raise(new KeyPressedEventArgs
        {
            VirtualKey = key,
            KeyChar = keyChar,
            Modifiers = modifiers
        });
        keyboard.KeyTyped.Raise(new KeyTypedEventArgs
        {
            VirtualKey = key,
            KeyChar = keyChar,
            Modifiers = modifiers
        });
        keyboard.KeyReleased.Raise(new KeyReleasedEventArgs
        {
            VirtualKey = key,
            Modifiers = modifiers
        });
    }
}
Clicking a WPF button takes the focus away from the browser, so the handler returns it first. Then it focuses the text field through the DOM API, in case the user clicked somewhere else on the page.
The press and typed events carry the key in VirtualKey and
the character in KeyChar; the release carries only the key. For
letters, digits, and space, the key code equals the code of
the uppercase character, so a cast is enough. Uppercase letters also
get ShiftDown, as on a real keyboard. For a symbol such as @, pass
the key that produces it on the user’s layout, for example
KeyCode.Vk2 with ShiftDown on a US keyboard.
In CefSharp, key events go through IBrowserHost, with the types
RawKeyDown, Char, and KeyUp. For RawKeyDown and KeyUp,
WindowsKeyCode holds the key code. For Char, it holds
the character code. Add the handler and a helper to
the CefSharp MainWindow.xaml.cs:
private async void TypeTask_Click(object sender, RoutedEventArgs e)
{
    IBrowserHost host = browser.GetBrowserHost();
    host.SendFocusEvent(true);
    await browser.EvaluateScriptAsync(
        "document.getElementById('task').focus()");
    TypeText(host, "Learn to surf");
}

private static void TypeText(IBrowserHost host, string text)
{
    foreach (char c in text)
    {
        // Key codes of letters, digits, and space equal their
        // uppercase character codes.
        int keyCode = char.ToUpperInvariant(c);
        CefEventFlags modifiers = char.IsUpper(c)
            ? CefEventFlags.ShiftDown
            : CefEventFlags.None;

        host.SendKeyEvent(new KeyEvent
        {
            Type = KeyEventType.RawKeyDown,
            WindowsKeyCode = keyCode,
            Modifiers = modifiers
        });
        host.SendKeyEvent(new KeyEvent
        {
            Type = KeyEventType.Char,
            WindowsKeyCode = c,
            Modifiers = modifiers
        });
        host.SendKeyEvent(new KeyEvent
        {
            Type = KeyEventType.KeyUp,
            WindowsKeyCode = keyCode,
            Modifiers = modifiers
        });
    }
}
The helpers look alike. DotNetBrowser keeps the key and
the character in separate fields, while CefSharp has one integer field
whose meaning depends on the event type. The handlers differ more:
CefSharp has no DOM API, so the handler returns the focus with
SendFocusEvent and focuses the text field with JavaScript. For
a broader comparison of the two libraries, see DotNetBrowser or
CefSharp and the migration
guide.
Simulating a mouse click
Next, we make Click Add work. A click is a mouse move, a press, and a release at one point. The hard part is finding the point: the position of the button in browser coordinates.
In DotNetBrowser, the DOM API finds the element, and
the SimulateClick extension method clicks it. Add the namespaces to
the DotNetBrowser MainWindow.xaml.cs:
using DotNetBrowser.Dom;
using DotNetBrowser.Input.Mouse;
using DotNetBrowser.Input.Mouse.Events;
Then add the handler:
private void ClickAdd_Click(object sender, RoutedEventArgs e)
{
    IElement addButton = browser.MainFrame.Document.GetElementById("add");
    browser.Mouse.SimulateClick(MouseButton.Left, addButton);
}
SimulateClick raises IMouse.Moved, IMouse.Pressed, and IMouse.Released
at the center of the element, with a short pause between them. If
you already have the coordinates, use the overload that takes
a Point. For a double-click or a drag, raise the mouse
events yourself, as we did with the keyboard. The same Raise()
pattern works for every event on IBrowser.Mouse, IBrowser.Keyboard, and
IBrowser.Touch, including the mouse wheel and touch gestures. For more
examples, see Simulating user input in the browser guide.
In CefSharp, a script finds the center of the button, and
the host sends the events there. Add the handler to
the CefSharp MainWindow.xaml.cs:
private async void ClickAdd_Click(object sender, RoutedEventArgs e)
{
    // There is no DOM API, so the button position comes from JavaScript.
    JavascriptResponse response = await browser.EvaluateScriptAsync(@"
        (() => {
            const rect = document.getElementById('add').getBoundingClientRect();
            return [rect.x + rect.width / 2, rect.y + rect.height / 2];
        })()");
    List<object> center = (List<object>)response.Result;
    int x = Convert.ToInt32(center[0]);
    int y = Convert.ToInt32(center[1]);

    IBrowserHost host = browser.GetBrowserHost();
    MouseEvent mouseEvent = new MouseEvent(x, y, CefEventFlags.None);
    host.SendMouseMoveEvent(mouseEvent, false);
    host.SendMouseClickEvent(mouseEvent, MouseButtonType.Left, false, 1);
    host.SendMouseClickEvent(mouseEvent, MouseButtonType.Left, true, 1);
}
EvaluateScriptAsync returns the JavaScript array as a List<object>
of boxed numbers. CefSharp expects coordinates relative to the top-left
corner of the view, and getBoundingClientRect() returns exactly that for
the main frame. Each SendMouseClickEvent call sends one event: mouseUp
is false for the press and true for the release.
Running the applications
Both projects are now complete. Run either one from the BucketList
folder:
dotnet run --project DotNetBrowserApp
dotnet run --project CefSharpApp
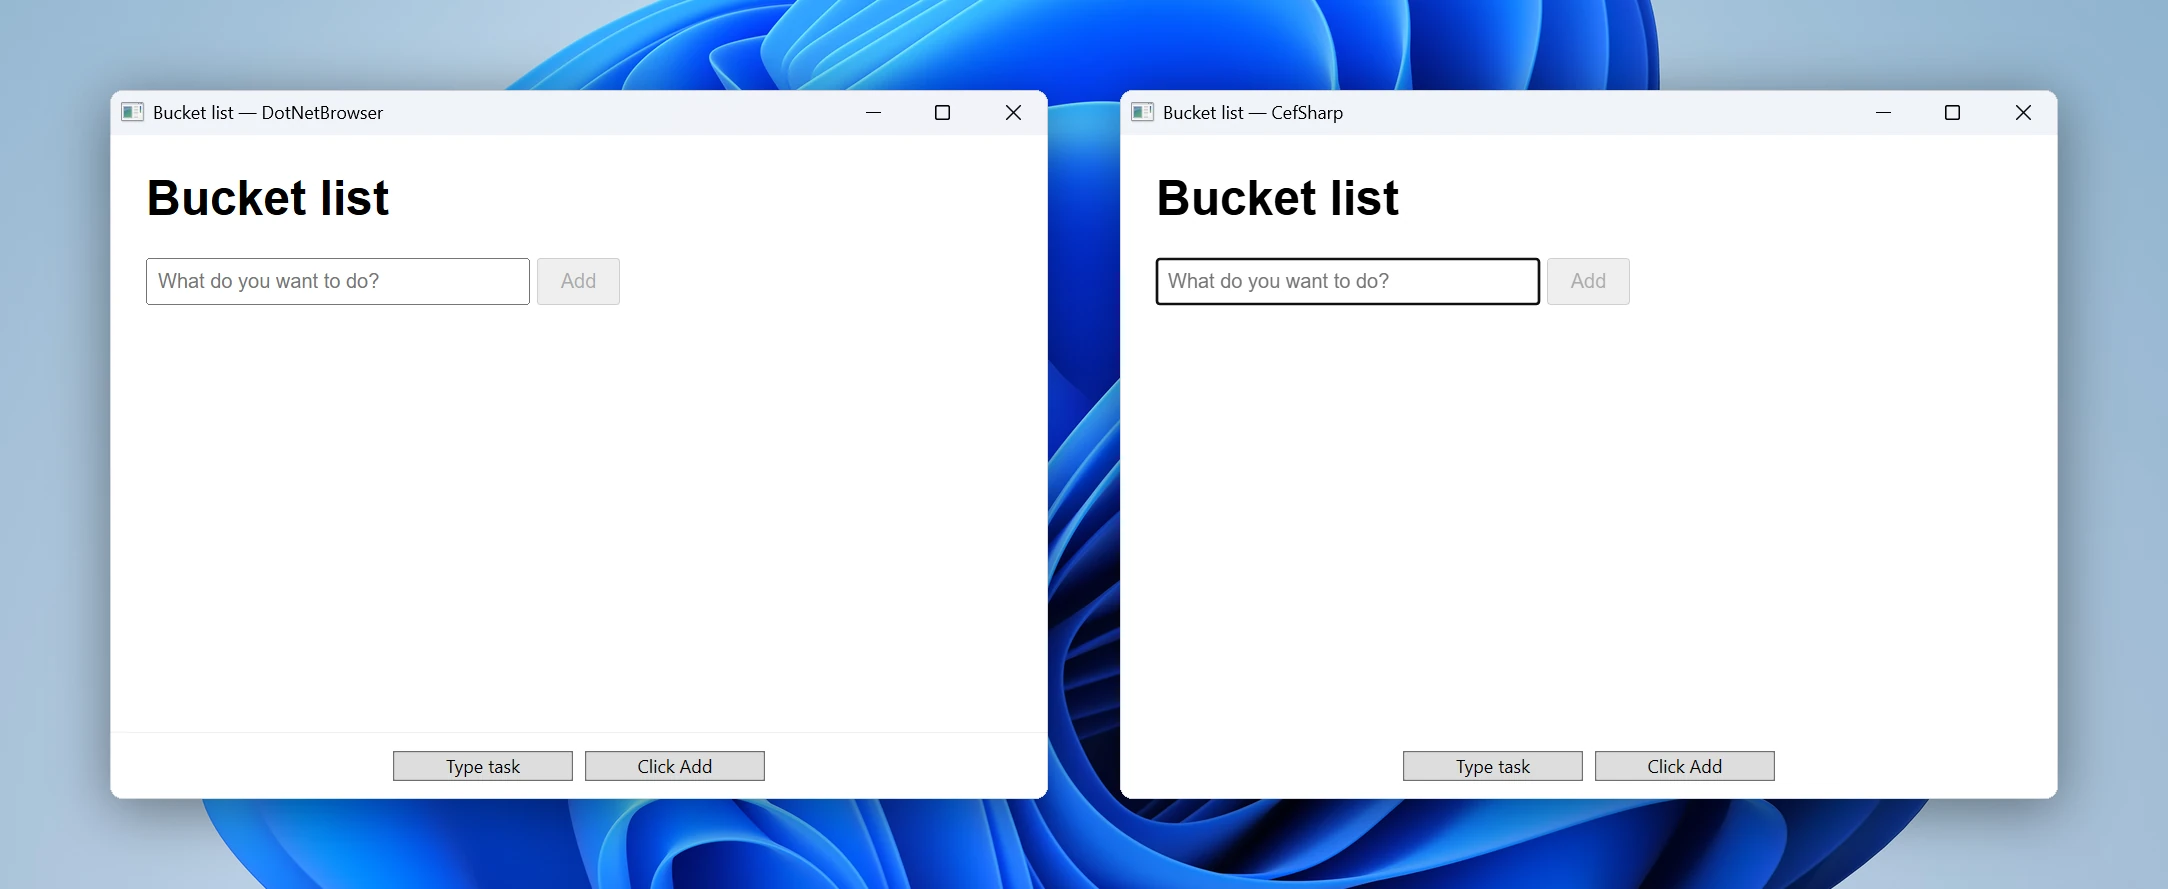
Both windows after startup.
Click Type task: the text appears in the field, and
the Add button becomes enabled, because the page received input
events. Then click Click Add: the task appears in the list,
the field clears, and the button is disabled again.
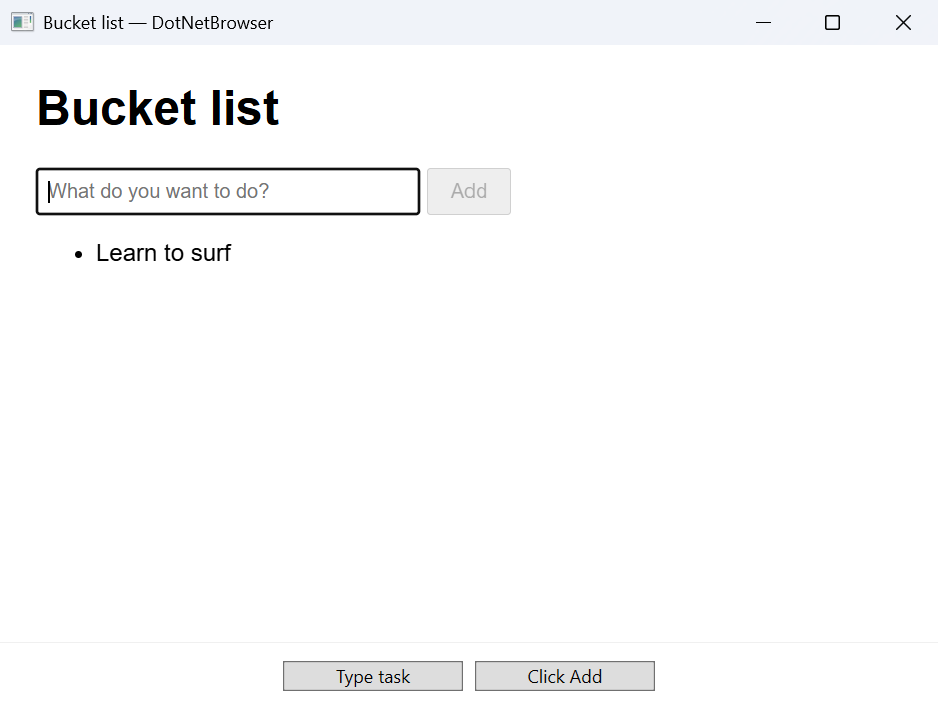
The task is added without anyone touching the page.
The complete example with both projects is available in the GitHub repository.
What about WebView2?
WebView2, Microsoft’s Edge-based web view, has no API for keyboard input. For
mouse input, there’s CoreWebView2CompositionController.SendMouseInput, but it
works only when you host WebView2 through its composition API, and the WPF
and Windows Forms controls don’t expose it.
That leaves the Chrome DevTools Protocol, the JSON interface that
debuggers use to control Chromium. CallDevToolsProtocolMethodAsync calls any
protocol method, including Input.dispatchKeyEvent and
Input.dispatchMouseEvent. You write the parameters as JSON by hand. For
example, one key press looks like this:
await webView.CoreWebView2.CallDevToolsProtocolMethodAsync(
    "Input.dispatchKeyEvent",
    @"{ ""type"": ""keyDown"", ""key"": ""L"", ""text"": ""L"" }");
This works, but every event is a string of hand-written JSON instead of
a typed object, and you compute the coordinates yourself with
ExecuteScriptAsync and getBoundingClientRect(), as in CefSharp. For details,
see the method reference and the Input
domain.
DotNetBrowser, on the other hand, gives you typed keyboard and mouse events and a DOM API to find the target, as in the code above. Here is how the three web views compare:
| CefSharp | WebView2 | DotNetBrowser | |
|---|---|---|---|
| Typing | SendKeyEvent() with raw key codes | DevTools Protocol | Keyboard events with Raise() |
| Clicking | SendMouseClickEvent() at coordinates | DevTools Protocol | Mouse.SimulateClick() on a DOM element |
| Finding the target | JavaScript | JavaScript | DOM API |
For more differences, see DotNetBrowser or WebView2 and the WebView2 migration guide.
Conclusion
In this tutorial, we built the same WPF application with DotNetBrowser and CefSharp, typed text into a web page, and clicked its button with simulated input. When a page reacts to values, use the DOM API. When it reacts to events, simulate input. The complete example is in the GitHub repository.
With simulated input, your app can work with any page the way a user does, whether you’re testing your own web UI or automating a web app you don’t control.

Sending…
Sorry, the sending was interrupted
Please try again. If the issue persists, contact us at info@teamdev.com.
Your personal DotNetBrowser trial key and quick start guide will arrive in your Email Inbox in a few minutes.