Large Language Models (LLMs) are advanced tools for code generation and data reasoning, but they lack the native ability to interact with external applications like web browsers. To utilize LLMs for real-world browser automation, they must be able to control applications and observe the results like a human.
The Model Context Protocol (MCP) provides this capability. It’s an open standard that defines a simple way for an LLM to communicate with external tools, giving it access to a web browser for tasks including testing, UI adjustments, accessibility checks, and data scraping.
JxBrowser is an embedded browser component for Java applications, commonly used for automation and data scraping. Just as with Google Chrome, you can use MCP to control JxBrowser from LLM. In this article, I’ll show how to integrate JxBrowser with an MCP server to automate it with an LLM.
Understanding the MCP flow
When using MCP to let an LLM control a browser, the flow looks like this:
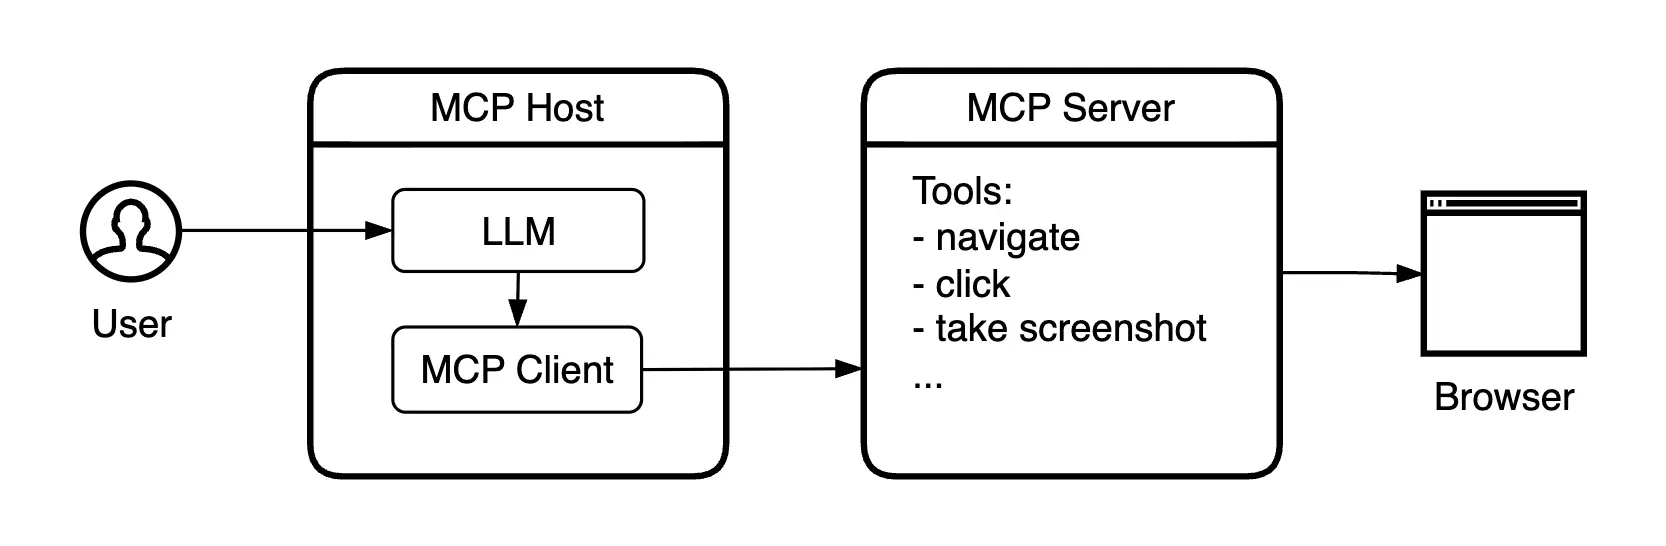
Browser automation with MCP.
The MCP host is usually your AI assistant app, such as Claude Desktop or Cursor. It runs the LLM and contains one or more MCP clients, each connected to a single MCP server. An MCP server is an external application that provides “tools” the model can use to take real actions.
When you type a prompt like “click the Login button,” the LLM interprets your request and decides which MCP tool to use. The MCP client sends this request to the MCP server, which runs the tool and performs the click in the browser.
Connecting the MCP server to JxBrowser
MCP servers connect to browsers in different ways. For a Chromium-based browser, there are two main options: Chrome DevTools Protocol (CDP) and a Chrome extension. Let’s take a quick look at both.
CDP provides a remote debugging interface that lets external tools send commands to the browser and receive browser events.
Capabilities:
- Can control page navigation, DOM manipulation, network traffic, and console logs.
- Supports headless (no-UI) automation.
Limitations:
- Requires remote debugging to be enabled at startup.
The following MCP servers use this approach: Playwright MCP, Chrome DevTools MCP.
Chrome extension runs inside the browser and interacts directly with the page’s DOM.
Capabilities:
- Can interact with the page and run scripts from inside the browser.
- Works even when CDP is disabled or unavailable.
Limitations:
- Requires installing and managing the extension inside the browser profile.
- Restricted to extension APIs, no low-level network, performance, or headless control.
The following MCP servers use this approach: Browser MCP, Chrome MCP Server.
Using DevTools Protocol
To automate JxBrowser through the Chrome DevTools Protocol, we will need to:
- Enable remote debugging when starting Chromium.
- Configure the MCP server in the AI assistant.
- Show the browser in a Swing window to observe automation in real time.
We’ll use the Playwright MCP server, though other MCP servers that work via remote debugging protocol will work as well.
Let’s start by configuring remote debugging:
var port = 9222;
var options = EngineOptions.newBuilder(HARDWARE_ACCELERATED)
        .addSwitch("--remote-allow-origins=http://localhost:" + port)
        .remoteDebuggingPort(port)
        .build();
var engine = Engine.newInstance(options);
var browser = engine.newBrowser();
This code starts the Chromium engine and opens the remote debugging port on
9222. Any tool that supports CDP can now connect to this port and control
the browser.
Most MCP servers can automatically detect and connect to the browser. To make them work with JxBrowser, you’ll need to specify the CDP endpoint in your MCP configuration. Add this to your AI assistant’s MCP config to connect the Playwright MCP server:
{
  "mcpServers": {
    "playwright": {
      "command": "npx",
      "args": [
        "@playwright/mcp@latest",
        "--cdp-endpoint",
        "http://localhost:9222"
      ]
    }
  }
}
To see the automation in real time, we will add a BrowserView component that
renders web content inside a Java Swing JFrame:
SwingUtilities.invokeLater(() -> {
    var frame = new JFrame("JxBrowser DevTools MCP");
    frame.setDefaultCloseOperation(DISPOSE_ON_CLOSE);
    frame.setSize(1280, 900);
    frame.setLocationRelativeTo(null);
    // Add component for rendering web content.
    frame.add(BrowserView.newInstance(browser), BorderLayout.CENTER);
    frame.setVisible(true);
});

// Load the required web page.
browser.navigation().loadUrl("http://localhost:3000/register");
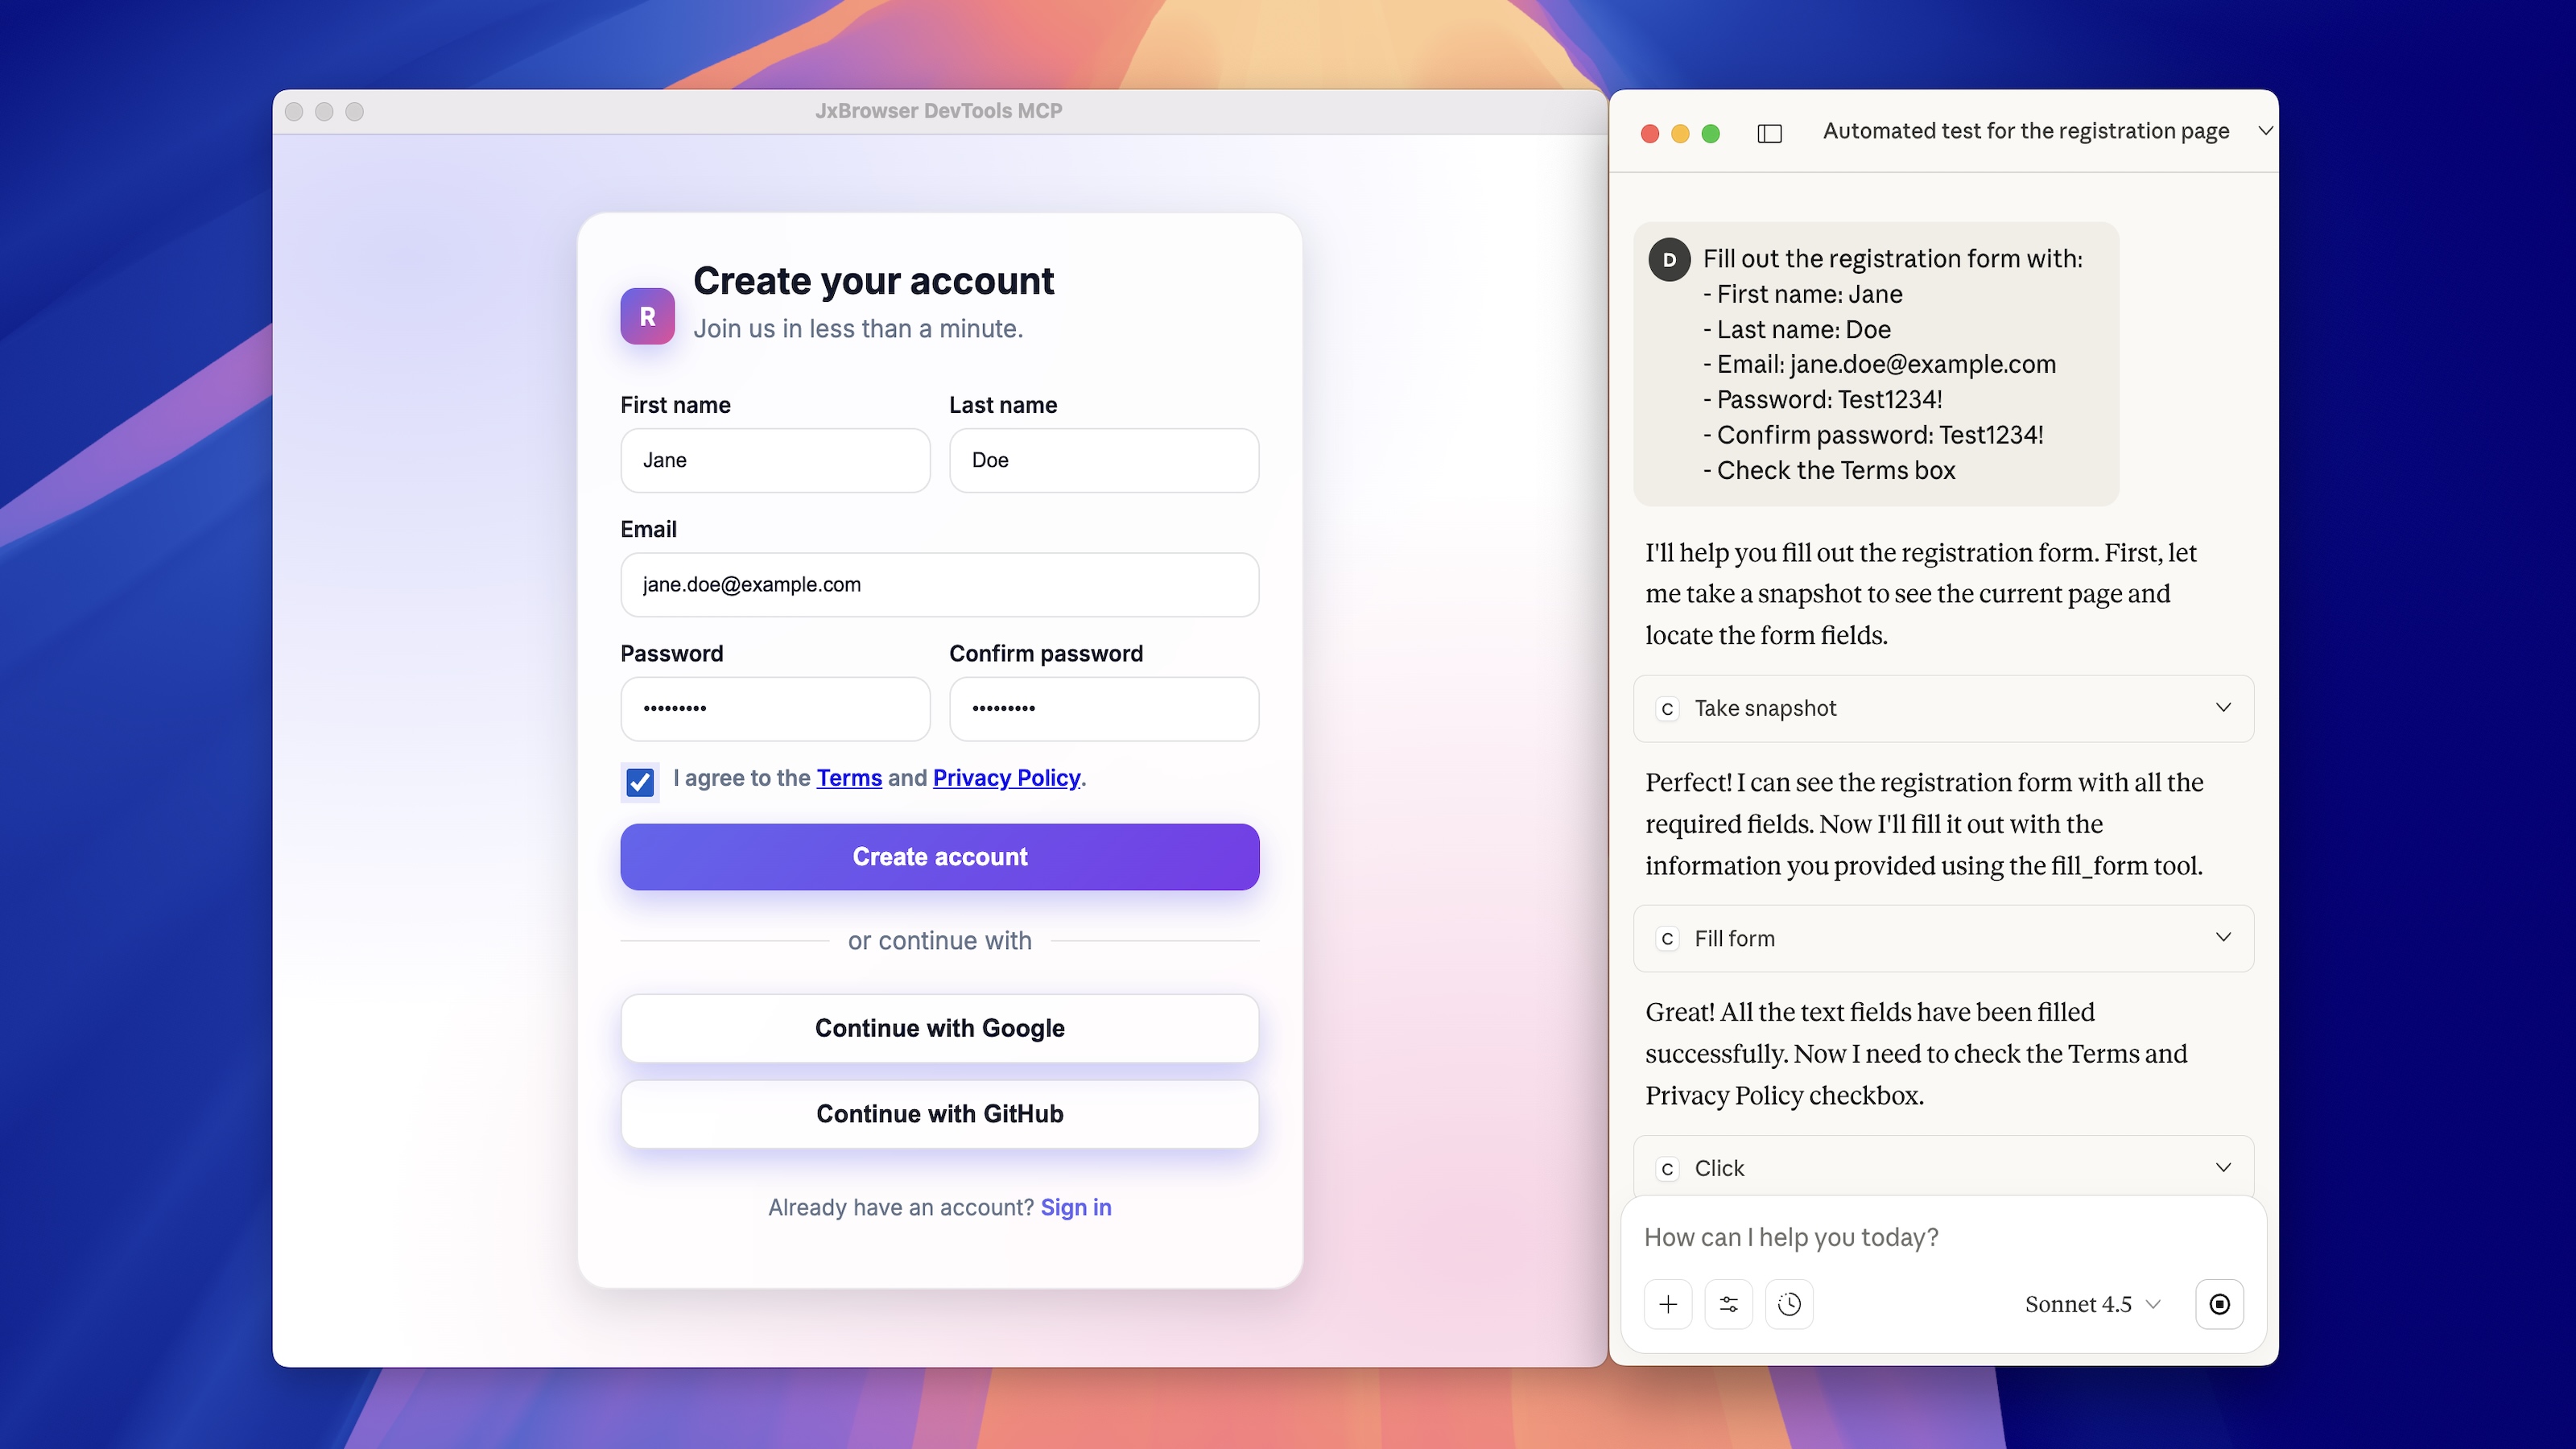
Once configured, your AI assistant can access the MCP server and perform actions inside JxBrowser. You can open a chat and tell it to open a page, click a button, or extract data, and watch the automation happen live in your app.
You can find the full example app in the GitHub repository.
Using Chrome Extension
To automate JxBrowser using a Chrome extension, we will need to:
- Install the MCP server extension in JxBrowser.
- Connect to the MCP server from the extension.
- Configure the MCP server in the AI assistant.
- Show the browser in a Swing window to observe automation.
Here, we’ll use the Browser MCP server. It requires installing the Browser MCP Chrome extension and connecting it to the MCP server.
In JxBrowser, you can install Chrome extensions from a CRX file or the Chrome Web Store. Here is an example of installing the extension from a CRX file:
var extension = profile.extensions().install(Paths.get("browser-mcp.crx"));
You can download a CRX file for an extension using JxBrowser. Check out the extensions guide to learn how.
When you click the Browser MCP extension icon on the Chrome toolbar, it shows a popup with a “Connect” button. This button needs to be pressed to connect the current tab to the MCP server.
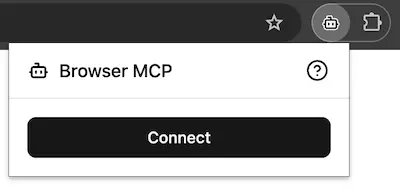
The Browser MCP extension popup.
In JxBrowser, we can open this popup from code and click on the button automatically via JavaScript:
// Register a handler for clicking the button when the popup is opened.
browser.set(OpenExtensionActionPopupCallback.class, (params, tell) -> {
    var popupBrowser = params.popupBrowser();
    popupBrowser.navigation().on(FrameDocumentLoadFinished.class, event -> {
        // Auto-click the "Connect" button.
        event.frame().executeJavaScript("document.querySelector('button.w-full')?.click()");
    });
    tell.proceed();
});

// Open the extension popup.
extension.action(browser).ifPresent(ExtensionAction::click);
This snippet automatically connects to the MCP server once the extension loads.
Next, add this config to your AI assistant to set up the Browser MCP server:
{
  "mcpServers": {
    "browsermcp": {
      "command": "npx",
      "args": [
        "@browsermcp/mcp"
      ]
    }
  }
}
As in the CDP example, embed the BrowserView in a Swing window to observe the
automation:
SwingUtilities.invokeLater(() -> {
    var frame = new JFrame("JxBrowser Extension MCP");
    frame.setDefaultCloseOperation(DISPOSE_ON_CLOSE);
    frame.setSize(1280, 900);
    frame.setLocationRelativeTo(null);
    // Add component for rendering web content.
    frame.add(BrowserView.newInstance(browser), BorderLayout.CENTER);
    frame.setVisible(true);
});

// Load the required web page.
browser.navigation().loadUrl("http://localhost:3000/register");
You can find the full example app here.
Hitting the context window limit
While testing MCP-based browser automation, we ran into a major limitation: the LLM’s context window fills up very quickly.
The context window is the model’s short-term memory — it stores the full conversation, including your messages, the model’s replies, and data returned from the MCP server. Once it’s full, the model can’t add new information or continue reasoning properly.
When using MCP, this limit is reached much faster than expected. Even simple actions on content-heavy pages can exhaust the available context. When that happens, AI assistants behave differently across apps. For example, Claude Desktop shows an error:
Claude hit the maximum length for this conversation. Please start a new conversation to continue chatting with Claude.
Why it happens
When an LLM calls a browser automation tool, the server often attaches a web page snapshot to the response. This snapshot isn’t raw HTML. It’s a structured, parsed view of the page — a tree of elements with identifiers, attributes, and text content. The model needs such snapshots to “see” where it is and decide what to do next. Larger pages generate larger snapshots, which can quickly fill the context window.
Additionally, when the MCP server connects, it automatically adds the descriptions of all its capabilities to the LLM’s context. More tools and more detailed descriptions mean more memory is used even before any work starts.
In practice, the size of a web page has a big impact on context usage. Even models with 200k-token context windows can hit the limit after only a few tool calls.
Possible solutions
- Use models with larger context windows. The more a model can remember, the more steps it can perform. However, these models are often more expensive to use.
- Use MCP servers that optimize page snapshots. Some MCP servers create smaller, more structured page snapshots that use fewer tokens. For example, the Chrome DevTools MCP server is often more efficient than others.
- Use screenshots instead of text-based snapshots. Images don’t take up text tokens, so it can be more efficient to let the model identify elements visually. Some MCP servers let you turn off page snapshots and use screenshots instead. In most AI assistants, you can manage this in the MCP tool settings. For example, in Claude Desktop, you can open the Tools dropdown in the conversation box and toggle which MCP tools are active. By doing so, you can ask the model to capture and analyze images of the page instead of processing large text snapshots.
Conclusion
MCP provides a workable approach to browser automation, and it’s easy to connect any popular MCP server to JxBrowser. This lets you use natural language to automate your Java app.
The main limitation is the context window size, which affects how long an automation session can run. Fortunately, this is improving with newer LLMs that support larger context windows and with more efficient MCP servers.
Try connecting your own LLM + MCP stack to JxBrowser and see how you can add AI-driven control to your Java app.
Sending…
Sorry, the sending was interrupted
Please try again. If the issue persists, contact us at info@teamdev.com.
Your personal JxBrowser trial key and quick start guide will arrive in your Email Inbox in a few minutes.