Browser
This guide describes how to create, use, and close Browser.
Please consider reading the Architecture guide to better understand how the JxBrowser architecture is designed, what main components it provides, and how it works.
Creating Browser
To create a new Browser instance, use the Profile.newBrowser() method. For example:
var browser = profile.newBrowser();
val browser = profile.newBrowser()
If you use Engine.newBrowser(), the browser is created under the default profile.
var browser = engine.newBrowser();
val browser = engine.newBrowser()
By default, Profile.newBrowser() and Engine.newBrowser() use the rendering mode configured in the Engine options.
You can override it for a specific browser:
import static com.teamdev.jxbrowser.engine.RenderingMode.OFF_SCREEN;
...
var browser = profile.newBrowser(OFF_SCREEN);
import com.teamdev.jxbrowser.engine.RenderingMode.OFF_SCREEN
...
val browser = profile.newBrowser(OFF_SCREEN)
To check the rendering mode of an existing browser, call browser.renderingMode().
This method performs the following actions:
- Creates a new
Browserinstance. - Loads the
about:blankweb page in it and waits until the web page is loaded completely.
Closing Browser
The Browser instance is running in a separate native process that allocates memory and system resources to be released. So, when a Browser instance is no longer needed, it should be closed through the Browser.close() method to release all the allocated memory and system resources. For example:
var browser = engine.newBrowser();
...
browser.close();
val browser = engine.newBrowser()
...
browser.close()
An attempt to use an already closed Browser instance will lead to the IllegalStateException.
The Browser instance is closed automatically in the following cases:
- When its
Engineis closed or unexpectedly crashed. - When
Browseris a pop-up that is closed from JavaScript usingwindow.close().
To get notifications when the Browser instance is closed, please use the BrowserClosed event. For example:
browser.on(BrowserClosed.class, event -> {});
browser.subscribe<BrowserClosed> { event -> }
To check whether Browser is closed please use the isClosed() method:
var closed = browser.isClosed();
val closed = browser.isClosed
Frames
The HTML documents of a web page are hosted in Frame objects, forming a hierarchy that mirrors the <frame> and
<iframe> structure of the page. These are the objects you’ll need to execute JavaScript and
work with DOM.
The Frame object that hosts the top-level document is called the main frame. To get the main frame,
use the following method:
Optional<Frame> mainFrame = browser.mainFrame();
val mainFrame: Frame? = browser.mainFrame
The main frame is not available if the page hasn’t finished loading.
Use FrameLoadFinished and FrameDocumentLoadFinished
events to learn when you can start working a frame instance.
To get the list of all frames, use the frames() method. The list will include the main frame and all sub-frames
at any level of nesting.
var frames = browser.frames();
for (var frame : frames) {
    var isMain = frame.isMain();
    var name = frame.name();
}
val frames = browser.frames
for (frame in frames) {
    val isMain = frame.isMain
    val name = frame.name()
}
To get the currently focused frame, use the focusedFrame() method:
// Will be empty if no frame is focused.
Optional<Frame> frame = browser.focusedFrame();
// Will be null if no frame is focused.
val frame: Frame? = browser.focusedFrame
Frame hierarchy
The Frame objects are organized in a hierarchy that matches the actual frames on the page. You can traverse this
hierarchy both upwards and downwards.
The Frame.children() method returns the immediate children of a frame. It allows you to traverse the hierarchy from
the main frame down to the deepest nested frames:
List<Frame> children = frame.children();
val children = frame.children()
Using the Frame.parent() method, you can traverse the hierarchy from any child frame to the main frame:
Optional<Frame> parent = frame.parent();
val parent = frame.parent
When traversing the frame hierarchy, it can be useful to match the <iframe> element with the corresponding
Frame object. For that, you can use FrameElement.contentDocument():
Element iframe = findSomeIframe();
FrameElement frameElement = (FrameElement) iframe;
frameElement.contentDocument().ifPresent(document -> {
    Frame frameInsideIframe = document.frame();
});
val iframe: Element = findSomeIFrame()
(iframe as FrameElement).contentDocument().ifPresent {
    val frameInsideIframe = it.frame()
}
Frame content
There are multiple ways to access web content in a Frame. The most popular way is to get rich objects using
JxBrowser’s DOM and JavaScript capabilities.
But sometimes you just need to get the whole HTML or text content of a frame. To get the HTML of the frame,
use the Frame.html() method:
var frameHtml = frame.html();
val frameHtml = frame.html
Alternatively, you can get the text content of the frame with the Frame.text() method. Be cautious when using this
method, as the returned text may not exactly match what is visible to the user:
var frameText = frame.text();
val frameText = frame.text()
Browser size
To get the current size of the Browser use the size() method:
var size = browser.size();
val size = browser.size
To update the size of the Browser use resize(int width, int height). For example:
browser.resize(800, 600);
browser.resize(800, 600)
This method notifies Chromium that the size of the Browser has been changed. Chromium will update the DOM layout of the loaded web page and repaint its content asynchronously. So, it might take some time for the web page to be repainted after the method returns.
User agent
You can override the default User Agent string and configure Browser to use a custom string. For example:
browser.userAgent("<user-agent>");
browser.userAgent("<user-agent>")
To get the current user agent string please use:
var userAgent = browser.userAgent();
val userAgent = browser.userAgent
User-Agent Client Hints
Apart from the user agent itself, you can override the User-Agent Client Hints. You can specify the various settings, such as:
- Browser brands and versions;
- Device form factor;
- Full browser version;
- Operating system platform;
- Platform version;
- CPU architecture;
- Bitness of the architecture (32-bit or 64-bit);
- Device model;
- Mobile status to check whether the browser is running on a mobile device.
- WoW64 detection to determine if a 32-bit browser is running on a 64-bit Windows OS.
To override the User-Agent Client Hints, use the following API:
var data = UserAgentData.newBuilder()
    .addBrand(UserAgentBrand.create("MyBrand", "1"))
    .addBrand(UserAgentBrand.create("MyBrand2", "2"))
    .addFormFactor("MyFormFactor")
    .fullVersion("1.0")
    .platform("MyOS")
    .platformVersion("1.0")
    .architecture("x86")
    .bitness("32")
    .model("MyModel")
    .mobile(true)
    .wow64(true)
    .build();
browser.userAgentData(data);
val data = UserAgentData.newBuilder()
    .addBrand(UserAgentBrand.create("MyBrand", "1"))
    .addBrand(UserAgentBrand.create("MyBrand2", "2"))
    .addFormFactor("MyFormFactor")
    .fullVersion("1.0")
    .platform("MyOS")
    .platformVersion("1.0")
    .architecture("x86")
    .bitness("32")
    .model("MyModel")
    .mobile(true)
    .wow64(true)
    .build()
browser.userAgentData(data)
To get the User-Agent Client Hints, please use:
var userAgentData = browser.userAgentData();
val userAgentData = browser.userAgentData()
Remote debugging URL
To get the remote debugging URL for a web page loaded in a particular Browser instance, use the following approach:
browser.devTools().remoteDebuggingUrl().ifPresent(url -> {});
val url = browser.devTools.remoteDebuggingUrl
This approach returns a valid URL only if the
Engine
was configured with the Remote Debugging Port.
Mouse, keyboard, and touch input
Intercepting events
JxBrowser allows you to intercept the mouse, keyboard, and touch events before they will be sent to the web page using the following callbacks:
Mouse:
EnterMouseCallbackExitMouseCallbackMoveMouseCallbackMoveMouseWheelCallback
Keyboard:
PressKeyCallbackPressMouseCallbackReleaseKeyCallbackReleaseMouseCallbackTypeKeyCallback
Touch:
StartTouchCallbackMoveTouchCallbackEndTouchCallbackCancelTouchCallback
The following example demonstrates how to suppress a mouse wheel:
browser.set(MoveMouseWheelCallback.class, params ->
        MoveMouseWheelCallback.Response.suppress()
);
browser.register(MoveMouseWheelCallback {
    MoveMouseWheelCallback.Response.suppress()
})
You can use these callbacks to get notifications about the mouse and keyboard events to implement hotkeys
in your application. Or you can suppress the default shortcuts such as Ctrl+C on Windows and Linux. For example:
browser.set(PressKeyCallback.class, params -> {
    var event = params.event();
    var keyCodeC = event.keyCode() == KeyCode.KEY_CODE_C;
    var controlDown = event.keyModifiers().isControlDown();
    if (controlDown && keyCodeC) {
        return PressKeyCallback.Response.suppress();
    }
    return PressKeyCallback.Response.proceed();
});
browser.register(PressKeyCallback { params ->
    val event = params.event()
    val keyCodeC = event.keyCode() == KeyCode.KEY_CODE_C
    val controlDown = event.keyModifiers().isControlDown
    if (controlDown && keyCodeC) {
        PressKeyCallback.Response.suppress()
    } else {
        PressKeyCallback.Response.proceed()
    }
})
Simulating user interaction
You can simulate keyboard, mouse, and touch interaction by dispatching input events directly to the Browser.
These are not DOM events: the browser handles them as the operating system input and generates a proper
sequence of DOM events.
Focusing browser
The browser must be focused in order to accept input events. Use the following code to focus the browser:
// Tell the browser it has focus.
browser.focus();
// Tell the browser it lost focus.
browser.unfocus();
// Tell the browser it has focus.
browser.focus()
// Tell the browser it lost focus.
browser.unfocus()
Keyboard events
To simulate typing, you can dispatch KeyPressed, KeyTyped, and KeyReleased events:
var character = 'h';
var keyCode = KeyCode.KEY_CODE_H;
var keyPressed = KeyPressed.newBuilder(keyCode)
        .keyChar(character)
        .build();
var keyTyped = KeyTyped.newBuilder(keyCode)
        .keyChar(character)
        .build();
var keyReleased = KeyReleased.newBuilder(keyCode)
        .build();

browser.dispatch(keyPressed);
browser.dispatch(keyTyped);
browser.dispatch(keyReleased);
val character = 'h'
val keyCode = KeyCode.KEY_CODE_H
val keyPressed = KeyPressed(keyCode, char = character)
val keyTyped = KeyTyped(keyCode, char = character)
val keyReleased = KeyReleased(keyCode)
with(browser) {
    dispatch(keyPressed)
    dispatch(keyTyped)
    dispatch(keyReleased)
}
Mouse events
To simulate mouse movements, clicks, drags, and wheel rotations, you can dispatch mouse events. For example:
// Dispatch mouse press and then release to simulate click.
var point = Point.of(50, 50);
var mousePressed = MousePressed.newBuilder(point)
        .button(MouseButton.PRIMARY)
        .clickCount(1)
        .build();
var mouseReleased = MouseReleased.newBuilder(point)
        .button(MouseButton.PRIMARY)
        .clickCount(1)
        .build();
browser.dispatch(mousePressed);
browser.dispatch(mouseReleased);
// Dispatch mouse press and then release to simulate click.
val point = Point.of(50, 50)
val mousePressed = MousePressed(
    point,
    button = MouseButton.PRIMARY,
    clickCount = 1
)
val mouseReleased = MouseReleased(
    point,
    button = MouseButton.PRIMARY,
    clickCount = 1
)
with(browser) {
    dispatch(mousePressed)
    dispatch(mouseReleased)
}
Touch events
To simulate touch interaction, you can dispatch touch events. For example:
var touchStarted = TouchStarted.newBuilder(touchPoints)
        .targetTouches(touchPoints)
        .build();
browser.dispatch(touchStarted);
val touchStarted = TouchStarted(touches, targetTouches = touches)
browser.dispatch(touchStarted)
Injecting JavaScript
If you need to execute some JavaScript code before any other script on the page, use InjectJsCallback. That callack
is triggered for every frame, immediately after the document is created:
browser.set(InjectJsCallback.class, params -> {
    var frame = params.frame();
    frame.executeJavaScript("window.myFunction = function() { ... }");
    return InjectJsCallback.Response.proceed();
});
browser.register(InjectJsCallback { params ->
    val frame = params.frame()
    frame.executeJavaScript<Any>("window.myFunction = function() { ... }")
    InjectJsCallback.Response.proceed()
})
You can use this callback to inject Java objects into the JavaScript world. Read more in the JavaScript guide.
Injecting custom styles
You may need to apply custom CSS to the pages you load in Browser. For that, use the InjectCssCallback that is
invoked for every frame, after the document element is created:
browser.set(InjectCssCallback.class, params -> {
    var css = "body { margin-top: 10px }";
    var frame = params.frame();
    if (frame.isMain()) {
        return InjectCssCallback.Response.inject(css);
    } else {
        return InjectCssCallback.Response.proceed();
    }
});
browser.register(InjectCssCallback { params ->
    val css = "body { margin-top: 10px }"
    val frame = params.frame()
    if (frame.isMain) {
        InjectCssCallback.Response.inject(css)
    } else {
        InjectCssCallback.Response.proceed()
    }
})
Screen sharing
Some web pages may want to start a screen sharing session. Chromium has the built-in functionality that allows sharing a screen, an application window, or a web page. In 7.20 the library API was extended with functionality that allows programmatically handling such requests or just display the standard Chromium dialog where the user can select the capture source.
To display the standard dialog use the following approach:
browser.set(StartCaptureSessionCallback.class, (params, tell) ->
        tell.showSelectSourceDialog()
);
browser.register(StartCaptureSessionCallback { params, tell ->
    tell.showSelectSourceDialog()
})

If you don’t want to display the dialog and would like to programmatically handle the requests, you can always programmatically select the capture source and start session:
browser.set(StartCaptureSessionCallback.class, (params, tell) -> {
    CaptureSources sources = params.sources();
    CaptureSource screen = sources.screens().get(0);
    // Tell the browser instance to start a new capture session
    // with the given capture source (the first entire screen).
    tell.selectSource(screen, AudioCaptureMode.CAPTURE);
});
browser.register(StartCaptureSessionCallback { params, tell ->
    val sources = params.sources()
    val screen = sources.screens().first()
    // Tell the browser instance to start a new capture session
    // with the given capture source (the first entire screen).
    tell.selectSource(screen, AudioCaptureMode.CAPTURE)
})
There are multiple overloads of the selectSource() method. They allow you to also capture the Browser instances,
other windows, and configure the visibility of notifications. Check the API reference
to find the option you need.
To programmatically stop the session, use the CaptureSessionStarted event. This event is triggered when a new capture
session has been started. You can get a reference to the capture session and stop it anytime. The following example
demonstrates how to stop the started capture session in 5 seconds:
browser.on(CaptureSessionStarted.class, event -> {
    var captureSession = event.capture();
    new java.util.Timer().schedule(new TimerTask() {
        @Override
        public void run() {
            // Stop the capture session in 5 seconds.
            captureSession.stop();
        }
    }, 5000);
});
browser.subscribe<CaptureSessionStarted> { event ->
    val captureSession = event.capture()
    Timer().schedule(5000) {
        // Stop the capture session in 5 seconds.
        captureSession.stop()
    }
}
You can get all active capture sessions using the captureSessions() method:
List<CaptureSession> sessions = browser.captureSessions();
val sessions = browser.captureSessions()
Desktop notifications
Secure (HTTPS) web pages may display desktop notifications to the end user via the Notifications API. The API is designed to be compatible with existing notification systems, across different platforms.
Notifications will not work if the web page is not secure (HTTPS).
To display the desktop notification you must grant the corresponding permissions:
engine.permissions().set(RequestPermissionCallback.class, (params, tell) -> {
    if (params.permissionType() == PermissionType.NOTIFICATIONS) {
        tell.grant();
    } else {
        tell.deny();
    }
});
engine.permissions.register(RequestPermissionCallback { params, tell ->
    if (params.permissionType() == PermissionType.NOTIFICATIONS) {
        tell.grant()
    } else {
        tell.deny()
    }
})
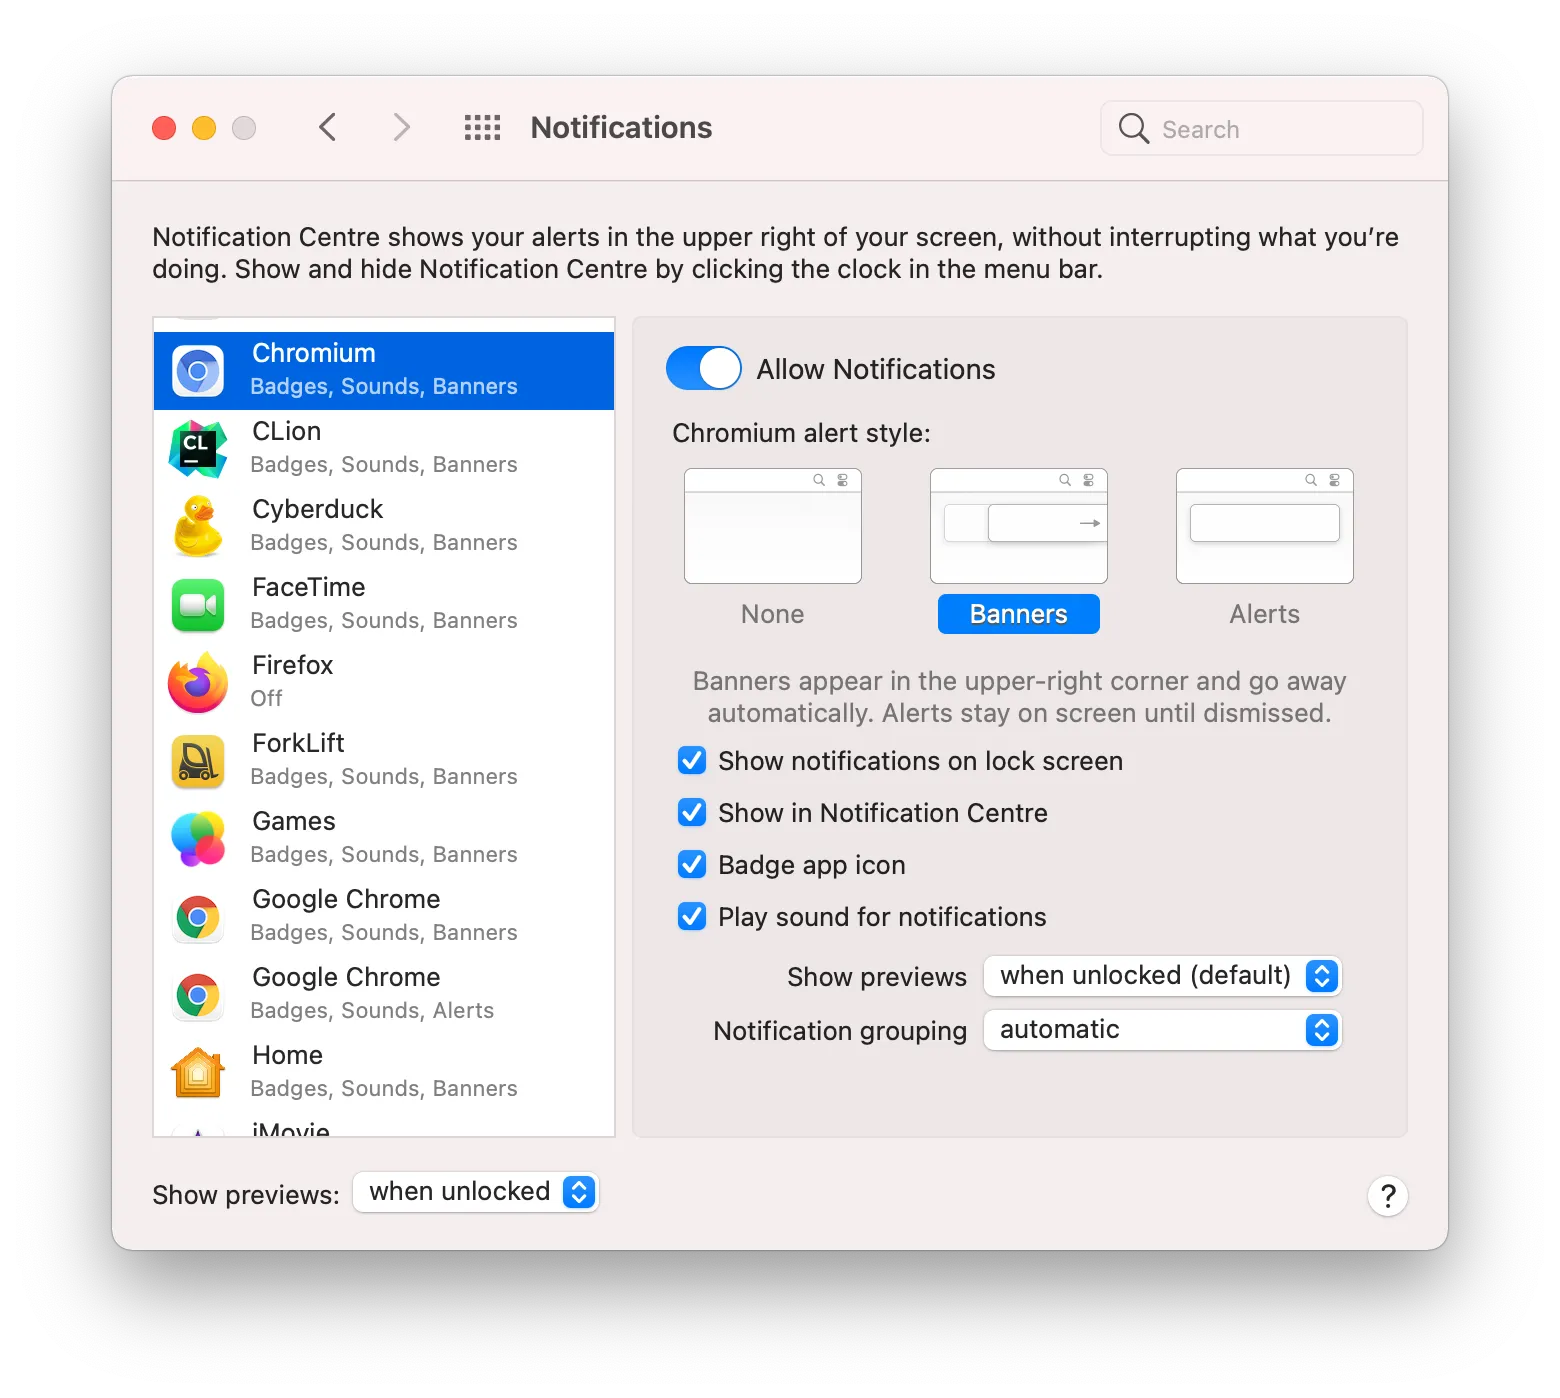
Some platforms require additional configuration to enable desktop notifications. On macOS, when JxBrowser is launched for the first time, the end user will be prompted to allow Chromium to show notifications.
Alternatively, the end user can enable/disable notifications for Chromium in macOS System Preferences -> Notification Centre:
Disabling desktop notifications
If your application doesn’t need to show notifications, and you’d like to avoid the prompt on macOS, you can completely
disable the notifications feature using the --disable-features switch:
var options = EngineOptions
        .newBuilder(HARDWARE_ACCELERATED)
        .addSwitch("--disable-features=NativeNotifications")
        .build();
var engine = Engine.newInstance(options);
val engine = Engine(HARDWARE_ACCELERATED) {
    switches = listOf(
        "--disable-features=NativeNotifications"
    )
}
Detecting unresponsive browsers
Under certain conditions, Chromium may decide that the browser has become unresponsive. This happens when JavaScript execution is blocked for a noticeable period while the user is actively trying to interact with the page.
Use the BrowserBecameUnresponsive event to detect when browser becomes unresponsive:
browser.on(BrowserBecameUnresponsive.class, params -> {
...
});
browser.subscribe<BrowserBecameUnresponsive> { params ->
...
}
When the browser becomes responsive again, JxBrowser will send you the BrowserBecameResponsive event:
browser.on(BrowserBecameResponsive.class, params -> {
...
});
browser.subscribe<BrowserBecameResponsive> { params ->
...
}
Settings
Using BrowserSettings you can configure different content settings for a single Browser instance:
BrowserSettings settings = browser.settings();
val settings = browser.settings
In this section, we describe how you can disable images, plugins, JavaScript, local storage, application cache, allow running insecure content, or allow JavaScript to access clipboard, etc.
Default background color
The default background color on a web page is white. It will be used while loading CSS styles and before applying the correct background color. This behavior can be disruptive for users if your application primarily displays web pages with dark backgrounds, as they may see a brief white flash during navigation between pages.
You can set a custom background color using the following code:
// Set the background color.
var darkGray = Color.rgb(0.25f, 0.25f, 0.25f);
settings.defaultBackgroundColor(darkGray);

// Get the current background color.
var color = settings.defaultBackgroundColor();
val darkGray = Color(0.25f, 0.25f, 0.25f)
settings.defaultBackgroundColor = darkGray
Default encoding
To configure the default text encoding on a web page use:
// Set the encoding.
settings.defaultEncoding("UTF-8");

// Get the current encoding.
var encoding = settings.defaultEncoding();
settings.defaultEncoding = "UTF-8"
JavaScript
By default, JavaScript is enabled on a web page. You can disable or enable JavaScript using the following setting:
// Disable JavaScript.
settings.disableJavaScript();
// Enable JavaScript.
settings.enableJavaScript();

// Get the current JavaScript status.
var enabled = settings.isJavaScriptEnabled();
settings.javascriptEnabled = false
Loading images from network
If you don’t need to load images from the network, you can disable automatic image loading. Still, the browser will display images embedded in the page, CSS, or JavaScript.
// Allow loading images from the network.
settings.allowLoadingImagesAutomatically();
// Disallow loading images from the network.
settings.disallowLoadingImagesAutomatically();

// Get the current status of image loading.
var allowed = settings.isAllowLoadingImagesAutomatically();
settings.automaticImagesLoadingAllowed = false
Displaying images
If you do not need to load or display any images on a web page, you can disable images completely:
// Disable loading and showing images.
settings.disableImages();
// Enable loading and showing images.
settings.enableImages();

// Check the current images status.
var enabled = settings.isImagesEnabled();
settings.imagesEnabled = false
Plugins
Some features of Chromium are implemented as plug-ins. For example, a built-in PDF viewer is a plug-in.
In the Plugins service, you can disable plug-ins selectively. But in browser settings,
you can enable or disable all plug-ins at once:
// Disable plug-ins.
settings.disablePlugins();
// Enable plug-ins.
settings.enablePlugins();

// Check the current plug-in's status.
var enabled = settings.isPluginsEnabled();
settings.pluginsEnabled = false
Local storage
The local WebStorage is enabled by default. In order to disable it and prevent JavaScript from storing data in the
local storage, use the following setting:
// Disable the local storage.
settings.disableLocalStorage();
// Enable the local storage.
settings.enableLocalStorage();

// Check the current local storage status.
var enabled = settings.isLocalStorageEnabled();
settings.localStorageEnabled = false
Scrollbars
You might want to hide scrollbars on a web page when taking a screenshot of a web page, or when inside a Kiosk app. In this case use the following setting:
// Hide scrollbars.
settings.hideScrollbars();
// Show scrollbars.
settings.showScrollbars();

// Get the current status of scrollbars.
var scrollbarsHidden = settings.scrollbarsHidden();
settings.scrollbarsHidden = true
Once you call this method, the web pages loaded in the Browser instance will not display scrollbars anymore.
Display mode
The display-mode CSS media feature defines how the web app is displayed in a regular browser, in the fullscreen mode, as a standalone app, or in other ways.
To configure the display-mode for the Browser, use this code:
// Set the display mode.
settings.displayMode(DisplayMode.FULLSCREEN);

// Get the current display mode.
var displayMode = settings.displayMode();
settings.displayMode = DisplayMode.FULLSCREEN
This setting changes the value in CSS and affects which CSS rules apply. But note, that this setting doesn’t change how the browser displays the web page.
In other words, the code above will activate CSS under @media (display-mode: fullscreen) media query, but will not
switch the browser into the fullscreen mode.
Accessing clipboard from JavaScript
There are two ways to access the clipboard in JavaScript:
- Modern approach: the
navigator.clipboardAPI (recommended). - Legacy approach: editor commands such as
document.execCommand('copy'). This method is disabled by default.
To enable or disable copying and pasting with the editor commands, use the allowJavaScriptAccessClipboard:.
// Disallow JavaScript to access clipboard via document.execCommand()
settings.disallowJavaScriptAccessClipboard();
// Allow JavaScript to access clipboard via document.execCommand()
settings.allowJavaScriptAccessClipboard();

// Get the current status.
var allowed = settings.isAllowJavaScriptAccessClipboard();
settings.canJavaScriptAccessClipboard = true
This setting does not apply to navigator.clipboard. For details on enabling clipboard access in modern JavaScript,
see the Clipboard guide.
Accessing cookies from JavaScript
By default, a web page can access cookies via the document.cookies property.
You can allow or disallow JavaScript to read and write to this property by using the following methods:
// Allow JavaScript to access document.cookies.
settings.allowJavaScriptAccessCookies();
// Disallow JavaScript to access document.cookies.
settings.disallowJavaScriptAccessCookies();
// Check if the JavaScript is allowed to access document.cookie.
var allowed = settings.isAllowJavaScriptAccessCookies();
settings.canJavaScriptAccessCookies = false
Running insecure content
By default, Chromium blocks HTTPS websites from loading or executing scripts, CSS, or other resources from
insecure hosts. You can allow or disallow that by using the allowRunningInsecureContent setting:
// Allow running insecure content in secure contexts.
settings.allowRunningInsecureContent();
// Disallow running insecure content in secure contexts.
settings.disallowRunningInsecureContent();

// Check if insecure content is allowed to run in secure contexts.
var allowed = settings.isAllowRunningInsecureContent();
settings.runningInsecureContentAllowed = true
Closing windows from JavaScript
You can allow or disallow JavaScript to close browser windows by calling window.close().
For this, use the following code:
// Disallow JavaScript to close windows.
settings.disallowScriptsToCloseWindows();
// Allow JavaScript to close windows.
settings.allowScriptsToCloseWindows();

// Check if JavaScript is allowed to close windows.
var allowed = settings.isAllowScriptsToCloseWindows();
settings.canJavaScriptCloseWindows = false
Default font size
You can modify the default font size of the web pages loaded in Browser using the new setting:
// Set the default font size.
settings.defaultFontSize(FontSizeInPixels.of(12));

// Get the current default font size.
var fontSize = settings.defaultFontSize();
settings.defaultFontSize = FontSizeInPixels(12)
Overscroll history navigation
JxBrowser allows navigating back/forward with a left/right swipe on devices with a touch screen. By default, the overscroll navigation is disabled. You can enable it as follows:
// Enable history navigation with swipe gestures:
settings.enableOverscrollHistoryNavigation();

// Disable history navigation with swipe gestures:
settings.disableOverscrollHistoryNavigation();

// Check if the history navigation with gestures is available.
var enabled = settings.isOverscrollHistoryNavigationEnabled();
settings.overscrollHistoryNavigationEnabled = true
Transparent background
The background of the web pages is opaque by default. To enable transparent background on the web pages, use the following setting:
// Enable the transparent background.
settings.enableTransparentBackground();
// Disable the transparent background.
settings.disableTransparentBackground();

// Check if the transparent background enabled.
var enabled = settings.isTransparentBackgroundEnabled();
settings.transparentBackgroundEnabled = true
This functionality works only in the off-screen rendering mode on Windows and Linux. On macOS it works in both rendering modes.
WebRTC IP handling
WebRTC can reveal a device’s IP addresses when it tries to establish a peer-to-peer connection. The IP handling policy controls which network interfaces and addresses WebRTC is allowed to expose.
You can select one of the following policies:
DEFAULT. WebRTC has the right to enumerate all interfaces and bind them to discover public interfaces.DEFAULT_PUBLIC_INTERFACES_ONLY. WebRTC should only use the default route used by HTTP. This doesn’t expose local addresses.DEFAULT_PUBLIC_AND_PRIVATE_INTERFACES. WebRTC should only use the default route used by HTTP. This also exposes the associated default private address.DISABLE_NON_PROXIED_UDP. WebRTC should only use TCP to contact peers or servers unless the proxy server supports UDP. This doesn’t expose any local addresses either.
Use the following code to configure the policy:
settings.webRtcIpHandlingPolicy(DEFAULT);
settings.webRtcIpHandlingPolicy(DEFAULT_PUBLIC_INTERFACES_ONLY);
settings.webRtcIpHandlingPolicy(DEFAULT_PUBLIC_AND_PRIVATE_INTERFACES);
settings.webRtcIpHandlingPolicy(DISABLE_NON_PROXIED_UDP);

// Get the current policy.
var policy = settings.webRtcIpHandlingPolicy();
settings.webRtcIpHandlingPolicy = DEFAULT
settings.webRtcIpHandlingPolicy = DEFAULT_PUBLIC_INTERFACES_ONLY
settings.webRtcIpHandlingPolicy = DEFAULT_PUBLIC_AND_PRIVATE_INTERFACES
settings.webRtcIpHandlingPolicy = DISABLE_NON_PROXIED_UDP
Favicon
You can get the current favicon of the page loaded in a Browser and get notified when it changes:
// The current favicon.
Bitmap favicon = browser.favicon();
// The size of the icon.
Size size = favicon.size();
// The pixels in RGBA format.
byte[] pixels = favicon.pixels();

// This event comes when a favicon changes.
browser.on(FaviconChanged.class, event -> {
    Bitmap newIcon = event.favicon();
});
// The current favicon.
val favicon: Bitmap = browser.favicon()
// The size of the icon.
var size = favicon.size()
// The pixels in RGBA format.
var pixels = favicon.pixels()

// This event comes when a favicon changes.
browser.subscribe<FaviconChanged> { event ->
    val newIcon: Bitmap = event.favicon()
}
You can save Bitmap objects into a PNG file in one call. Check the guide on taking snapshots
to learn how.
Status line
When a user moves the mouse cursor over the link, the browser changes the statys line. You can track changes of the
browser’s status line using the StatusChanged event:
browser.on(StatusChanged.class, params -> {
    var newStatusLine = params.statusText();
});
browser.subscribe<StatusChanged> { params ->
    val newStatusLine = params.statusText()
}
Display
You can get the information about the display where the browser is located on:
var display = browser.display();

// The scale factor of the display.
float scaleFactor = display.scaleFactor();
val display = browser.display()

// The scale factor of the display.
val scaleFactor = display.scaleFactor()
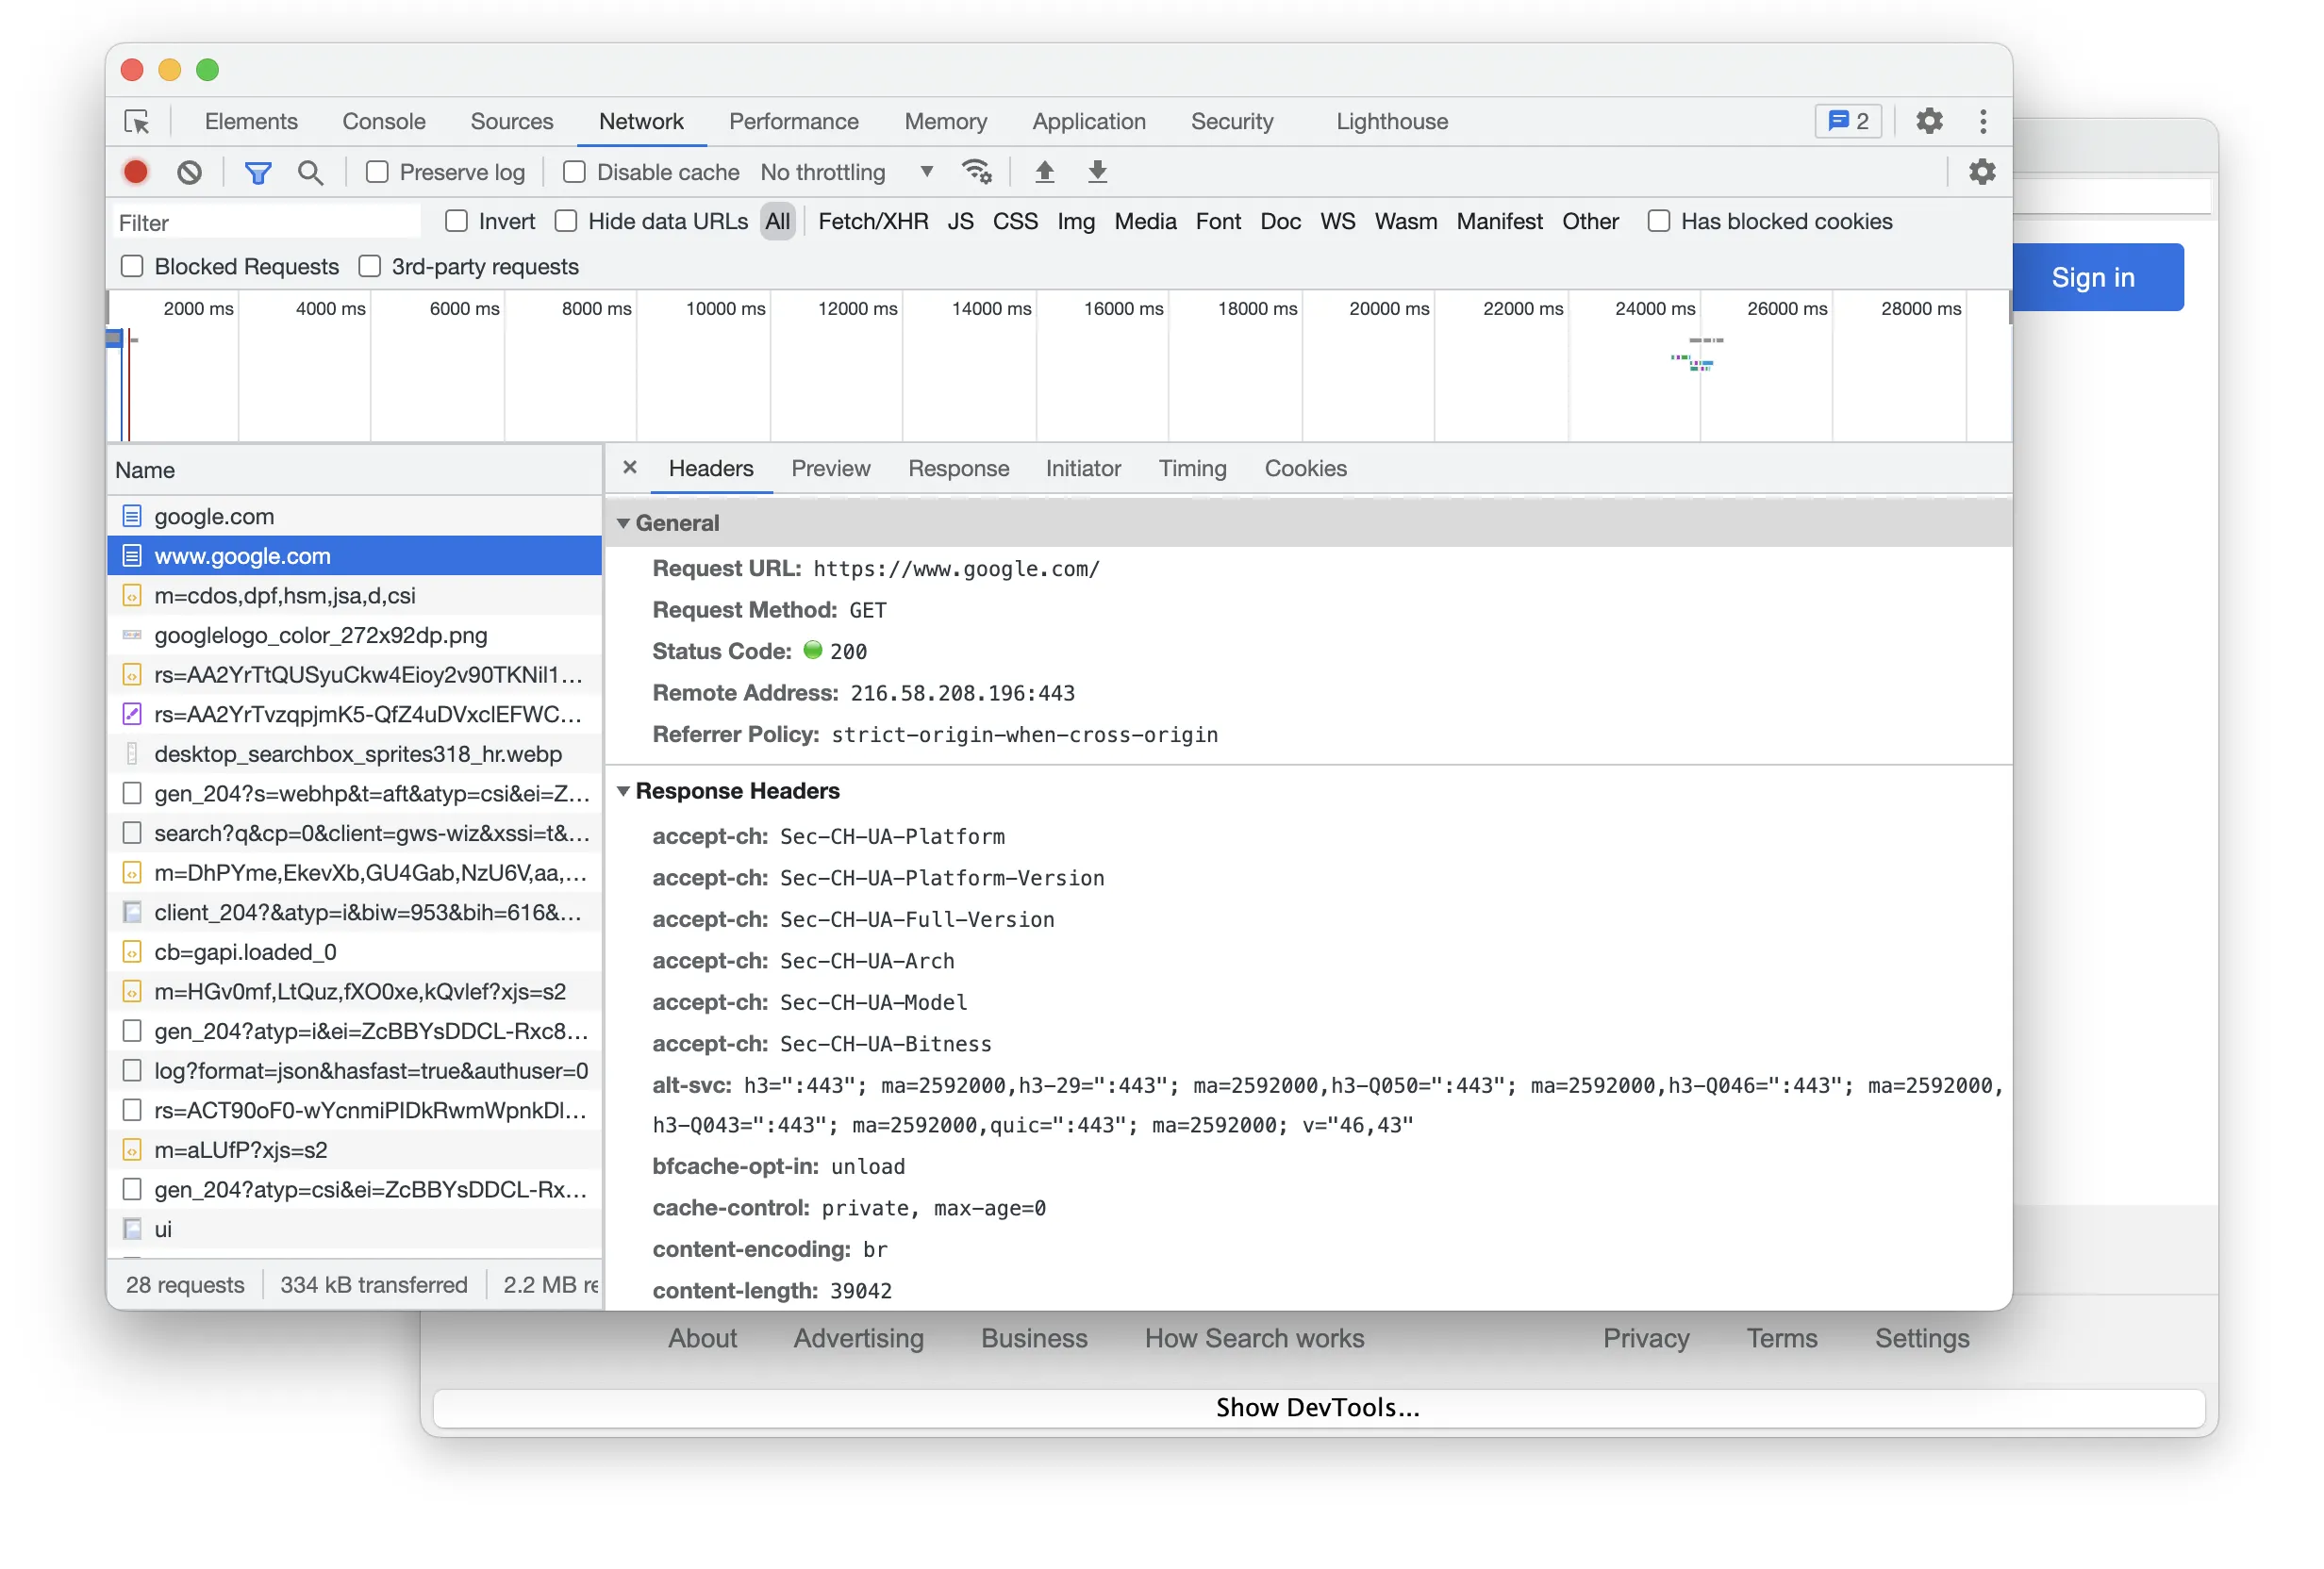
DevTools
You can show/hide the DevTools window programmatically without configuring Remote Debugging Port:
browser.devTools().show();
browser.devTools.show()
DevTools will be displayed in a separate window:
View source
Additionally, you can open a pop-up window with the source code of any frame. That is an alternative to Google Chrome’s
“View Page Source” context menu action that opens a view-source:https://.../ URL:
frame.viewSource();
frame.viewSource()