Configuring Selenium WebDriver
This tutorial shows how to create a simple Selenium WebDriver application that is configured to access a web page loaded in a desktop JxBrowser-based application.
Prerequisites
To go through this tutorial we will need:
- Git.
- Java 17 or higher.
- A valid JxBrowser license. It can be either Evaluation or Commercial. For more information on licensing please see the licensing guide.
Getting the code
To see complete applications created in this tutorial, please check out our collection of examples:
$ git clone https://github.com/TeamDev-IP/JxBrowser-Examples
$ cd JxBrowser-Examples/tutorials/selenium
There you will find README.md with the steps to launch the tutorial example.
JxBrowser application
Creating application
Create a simple JxBrowser application.
Adding the license
To move forward, put the license key into the application.
Configuring Chromium
When Selenium launches our application, ChromeDriver passes the --remote-debugging-port=<port>
argument to the command line arguments.
In our application, we first obtain the --remote-debugging-port argument from the command line arguments:
private static Optional<Integer> remoteDebuggingPortFromCommandLine(String[] args) {
    if (args.length > 0) {
        for (var arg : args) {
            if (arg.startsWith(REMOTE_DEBUGGING_PORT_ARG)) {
                var port = arg.substring(REMOTE_DEBUGGING_PORT_ARG.length());
                return Optional.of(Integer.parseInt(port));
            }
        }
    }
    return Optional.empty();
}
Then forward it to Chromium launched by JxBrowser:
// Create a builder for EngineOptions.
var builder = EngineOptions.newBuilder(HARDWARE_ACCELERATED);

// Configure Engine with the remote debugging port obtained from the command line args.
remoteDebuggingPortFromCommandLine(args).ifPresent(builder::remoteDebuggingPort);
Now we can create a Browser instance and load a web page that Selenium WebDriver will detect and work with it through
ChromeDriver.
import static com.teamdev.jxbrowser.engine.RenderingMode.HARDWARE_ACCELERATED;

import com.teamdev.jxbrowser.engine.Engine;
import com.teamdev.jxbrowser.engine.EngineOptions;
import com.teamdev.jxbrowser.view.swing.BrowserView;

import java.awt.BorderLayout;
import java.awt.event.WindowAdapter;
import java.awt.event.WindowEvent;
import java.util.Optional;
import javax.swing.JFrame;
import javax.swing.SwingUtilities;
import javax.swing.WindowConstants;

/**
 * A simple Swing application with a web page loaded in {@code BrowserView} that
 * will be run by Selenium WebDriver later on and debugged via the remote
 * debugging port obtained from the command line.
 */
public final class App {

    private static final String REMOTE_DEBUGGING_PORT_ARG = "--remote-debugging-port=";

    public static void main(String[] args) {
        // Set your JxBrowser license key.
        System.setProperty("jxbrowser.license.key", "your_license_key");

        // Create a builder for EngineOptions.
        var builder = EngineOptions.newBuilder(HARDWARE_ACCELERATED);

        // Configure Engine with the remote debugging port obtained from the command line args.
        remoteDebuggingPortFromCommandLine(args).ifPresent(
                builder::remoteDebuggingPort);

        // Creating Chromium engine.
        var engine = Engine.newInstance(builder.build());
        var browser = engine.newBrowser();

        SwingUtilities.invokeLater(() -> {
            // Creating Swing component for rendering web content
            // loaded in the given Browser instance.
            var view = BrowserView.newInstance(browser);

            // Creating and displaying Swing app frame.
            var frame = new JFrame();
            frame.addWindowListener(new WindowAdapter() {
                @Override
                public void windowClosing(WindowEvent e) {
                    engine.close();
                }
            });
            frame.setDefaultCloseOperation(WindowConstants.DISPOSE_ON_CLOSE);
            frame.add(view, BorderLayout.CENTER);
            frame.setSize(800, 700);
            frame.setLocationRelativeTo(null);
            frame.setVisible(true);

            browser.navigation().loadUrl("https://google.com");
        });
    }

    private static Optional<Integer> remoteDebuggingPortFromCommandLine(
            String[] args) {
        if (args.length > 0) {
            for (var arg : args) {
                if (arg.startsWith(REMOTE_DEBUGGING_PORT_ARG)) {
                    var port = arg.substring(
                            REMOTE_DEBUGGING_PORT_ARG.length());
                    return Optional.of(Integer.parseInt(port));
                }
            }
        }
        return Optional.empty();
    }
}
Check out the complete application.
Creating the executable file
To create the executable file of our program, we recommend using the separate buildApplication
Gradle task that uses jpackage to create executable for the current platform, or any
other way convenient for you.
Selenium application
Installing Selenium dependencies
Create a separate project and install the dependencies for running Selenium tests with ChromeDriver.
Downloading ChromeDriver
To download the correct version of ChromeDriver, we recommend using the separate
downloadChromeDriver Gradle task that downloads ChromeDriver for
the latest JxBrowser version.
Configuring Selenium WebDriver
To tell Selenium where to find the application, provide an absolute/relative path to an executable file of the application as shown below:
var options = new ChromeOptions();

// Set a path to your JxBrowser application executable.
options.setBinary(
        new File("tutorials/selenium/target-app/build/application/App.exe"));
Then specify the remote debugging port for communicating with the JxBrowser-based application:
// Set a port to communicate on.
options.addArguments("--remote-debugging-port=9222");
The port should not be used by other apps. In this tutorial we use 9222, but feel free to use any other available port.
The complete application to run:
import static com.teamdev.jxbrowser.os.Environment.isLinux;
import static com.teamdev.jxbrowser.os.Environment.isMac;
import static com.teamdev.jxbrowser.os.Environment.isWindows;
import static java.util.Objects.requireNonNull;

import java.io.File;
import java.net.URISyntaxException;
import java.net.URL;
import java.nio.file.Paths;

import org.openqa.selenium.chrome.ChromeDriver;
import org.openqa.selenium.chrome.ChromeOptions;

/**
 * Configures Selenium WebDriver (ChromeDriver) to run the JxBrowser-based
 * application and get access to the loaded web page.
 */
public final class SeleniumLauncher {

    public static void main(String[] args) throws URISyntaxException {
        URL chromeDriverUrl = requireNonNull(
                SeleniumLauncher.class.getResource(chromeDriverFile()));
        // Set a path to the ChromeDriver executable.
        System.setProperty("webdriver.chrome.driver",
                Paths.get(chromeDriverUrl.toURI()).toString());

        var options = new ChromeOptions();

        // Set a path to your JxBrowser application executable.
        options.setBinary(new File(binaryPath()));
        // Set a port to communicate on.
        options.addArguments("--remote-debugging-port=9222");

        var driver = new ChromeDriver(options);

        // Now you can use WebDriver.
        System.out.printf("Current URL: %s\n", driver.getCurrentUrl());

        driver.quit();
    }

    private static String binaryPath() {
        var applicationDirectory =
                "tutorials/selenium/target-app/build/application/";
        if (isMac()) {
            return applicationDirectory
                    + "App.app/Contents/MacOS/App";
        } else if (isWindows()) {
            return applicationDirectory + "App/App.exe";
        } else if (isLinux()) {
            return applicationDirectory + "App/bin/App";
        }

        throw new IllegalStateException("The platform is unsupported.");
    }

    private static String chromeDriverFile() {
        if (isWindows()) {
            return "chromedriver.exe";
        }
        return "chromedriver";
    }
}
Check out the complete application.
Running Selenium
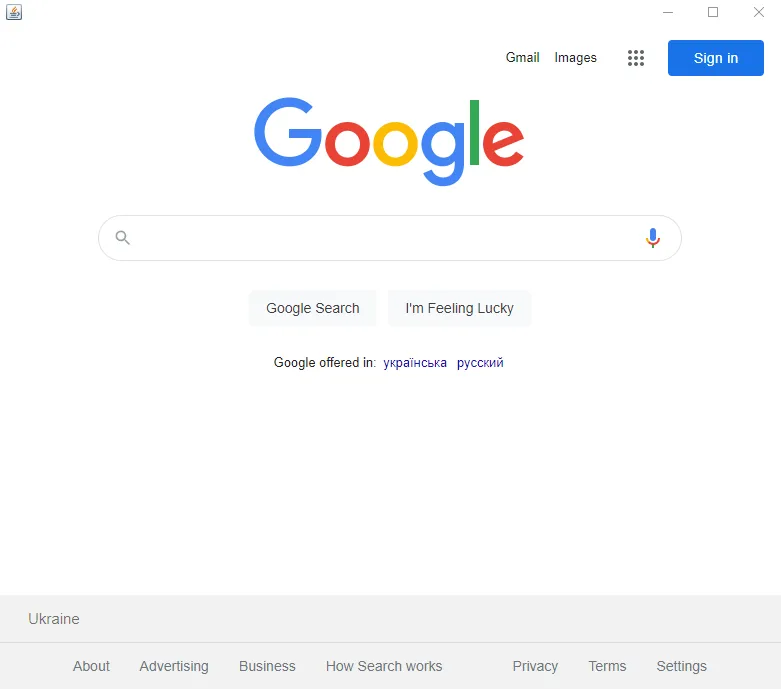
Run Selenium and if everything configured properly, you will see a Java window with the Google web page in it:

In the console you should see the following output:
Current URL: about:blank
// or
Current URL: https://www.google.com/
It means that Selenium WebDriver managed to successfully run our application, set up a connection with the JxBrowser’s Chromium engine, and access the loaded web page to print its URL.
Summary
In this tutorial we:
- Create two applications: the application where we integrate JxBrowser to display a web page, and the application with Selenium ChromeDriver that connects to the first application and accesses the web page loaded in JxBrowser.
- Show how to make the application with JxBrowser “visible” to Selenium.
- Run the Selenium application on the JxBrowser-based application binaries to demonstrate how it works.