

You buy a new gaming mouse. It works out of the box, but the features you paid for — extra buttons, adjustable sensitivity, RGB lighting — sit behind one more download: the companion app. You install it, remap the side buttons, tune the pointer speed, pick a lighting effect, and only then the mouse feels like yours. For a modern peripheral, the companion app is not an accessory. It is where half of the product lives.
Now look at the same scene from the other side. Suppose you are a hardware company shipping its first line of mice or keyboards. The devices are designed, the firmware works, and then it turns out your customers expect an app: something that configures buttons and lighting, stores profiles, updates firmware, and runs on both Windows and macOS. That app is a full software product of its own, and building it requires a skill set quite different from designing hardware.
In this article, we look at what device configuration software does, what it takes to build it, and then walk through the architecture of MōDevice — an open-source demo companion app for mice and keyboards, built with MōBrowser. Its source code is available on GitHub and can serve as a starting point for your own software.
What users expect
Both scenes point to the same list of requirements. The user treats the companion app as part of the device and judges it the way they judge any modern application. For the manufacturer, each of these expectations turns into an engineering task:
- An interactive user interface. The app shows the device itself, and every change is visible immediately: a lighting color applies while you drag the slider, and a remapped key is highlighted on the keyboard image.
- Low-level device access. Reading battery levels and firmware versions or writing settings to the device goes through USB or Bluetooth, vendor protocols, and system APIs. This is native code territory, usually C or C++.
- Cross-platform support. Customers run Windows and macOS, and they expect the same app, with the same features, on both.
- Persistent settings and profiles. Button assignments, sensitivity, and lighting must survive application restarts and device reconnects.
- Updates. The app checks for its own updates and, in real products, often delivers firmware updates to the device as well.
The difficulty is that the first two requirements pull in opposite directions. Rich, responsive interfaces are the home turf of web technologies, while talking to a device controller is the home turf of C and C++. A team that is strong in one area is rarely staffed for the other, and a hardware company entering the market may have neither: its expertise is in electronics and firmware.
Cross-platform support makes this worse. Two native applications — one for Windows, one for macOS — double the work and drift apart over time. So the practical question is how to build one application with a modern interface, real low-level access, and a single codebase for both platforms. To answer it, we built a working example.
The MōDevice demo
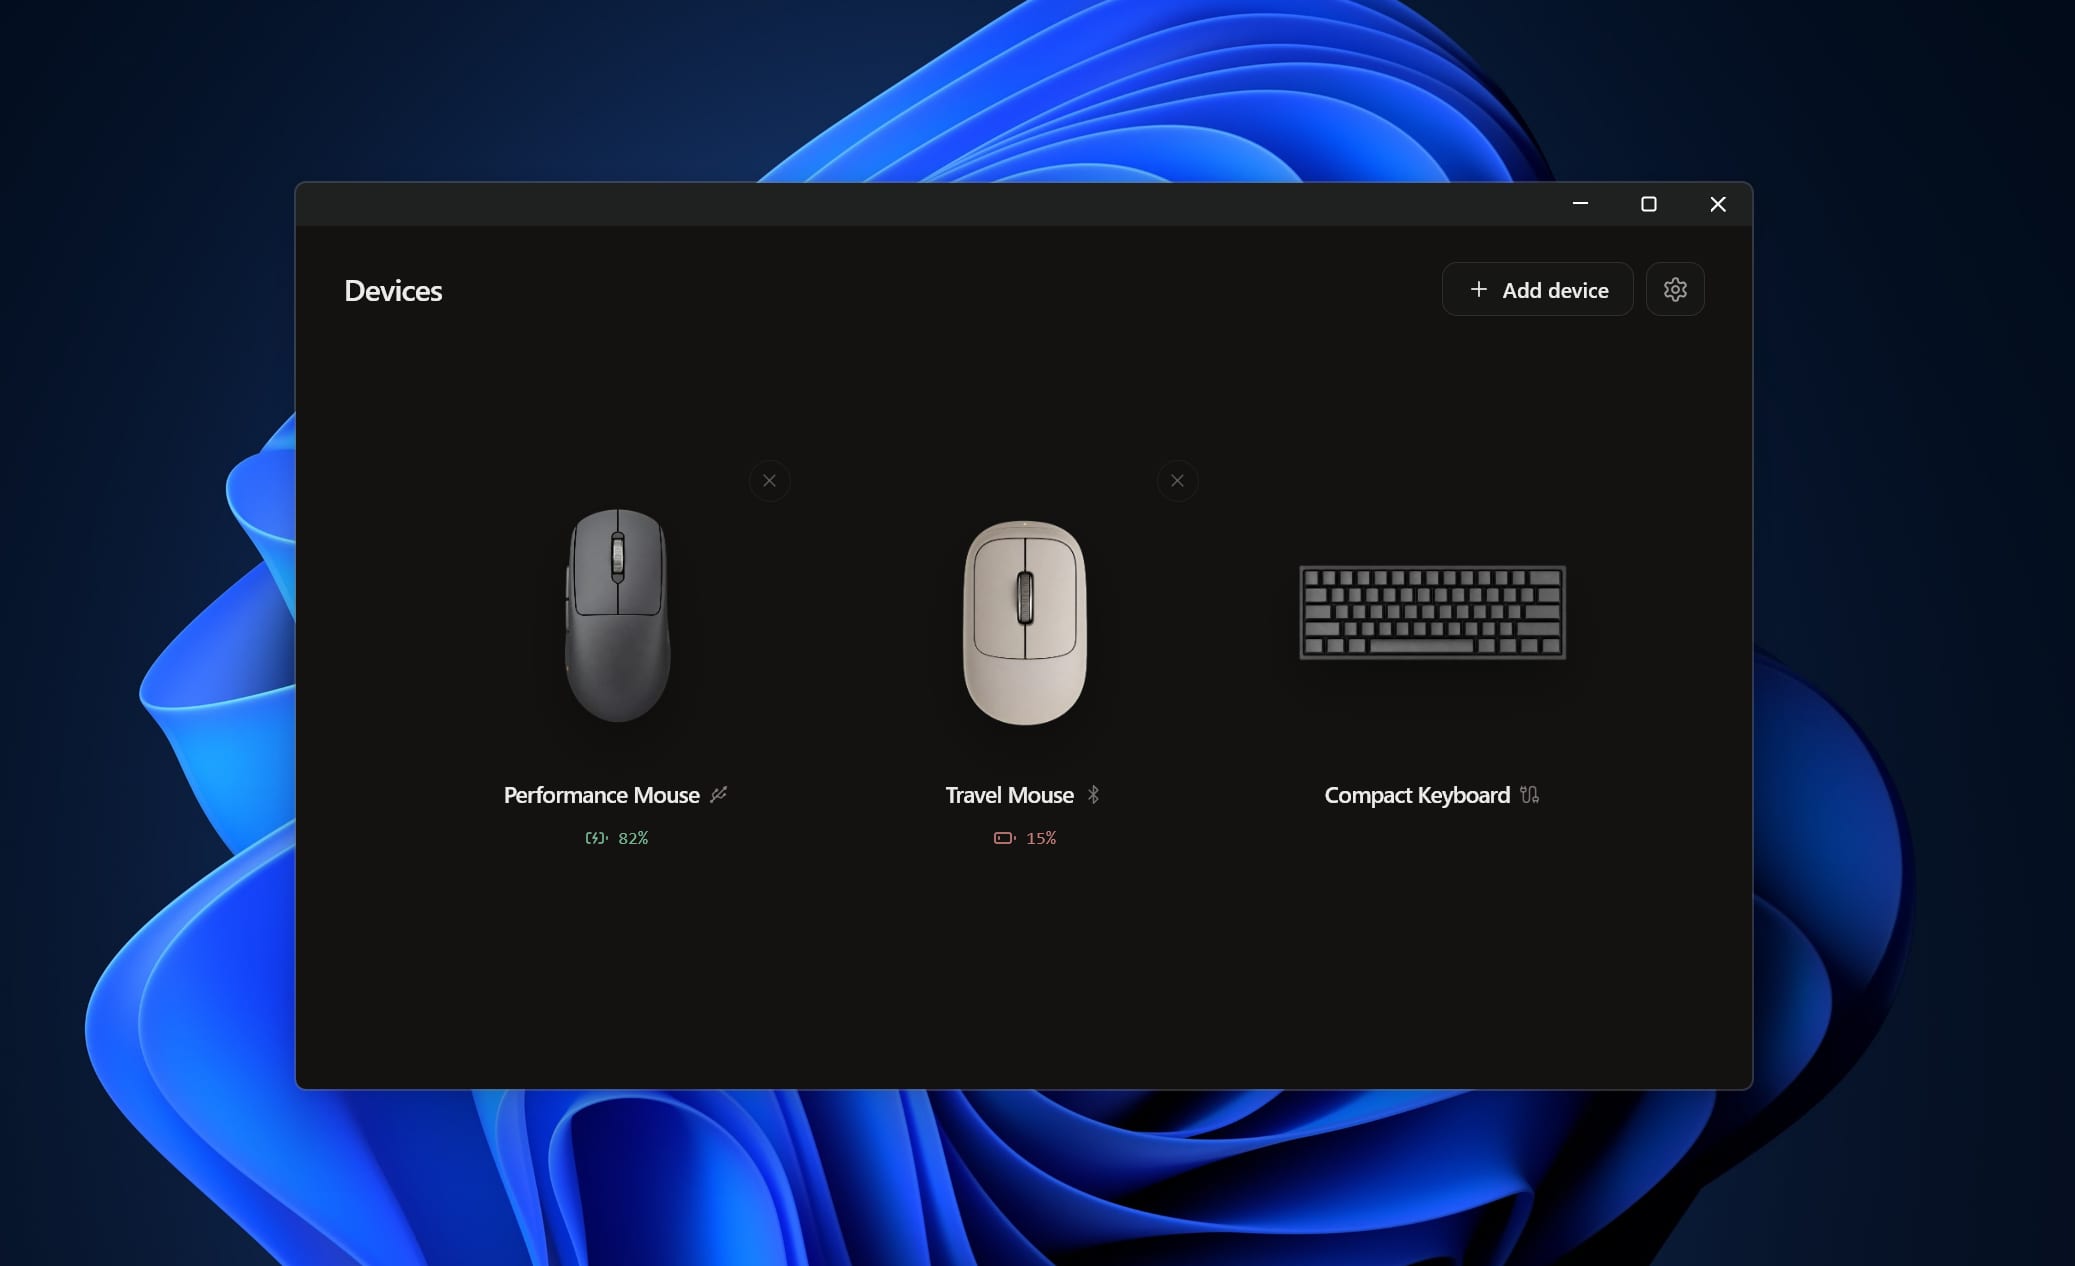
MōDevice is an open-source reference application for configuring mice and keyboards. It behaves like the companion apps that ship with commercial peripherals: it shows the connected devices with their battery, connection, and firmware information, discovers and pairs wireless devices, remaps mouse buttons and keyboard keys, and controls backlight effects, color, and brightness.
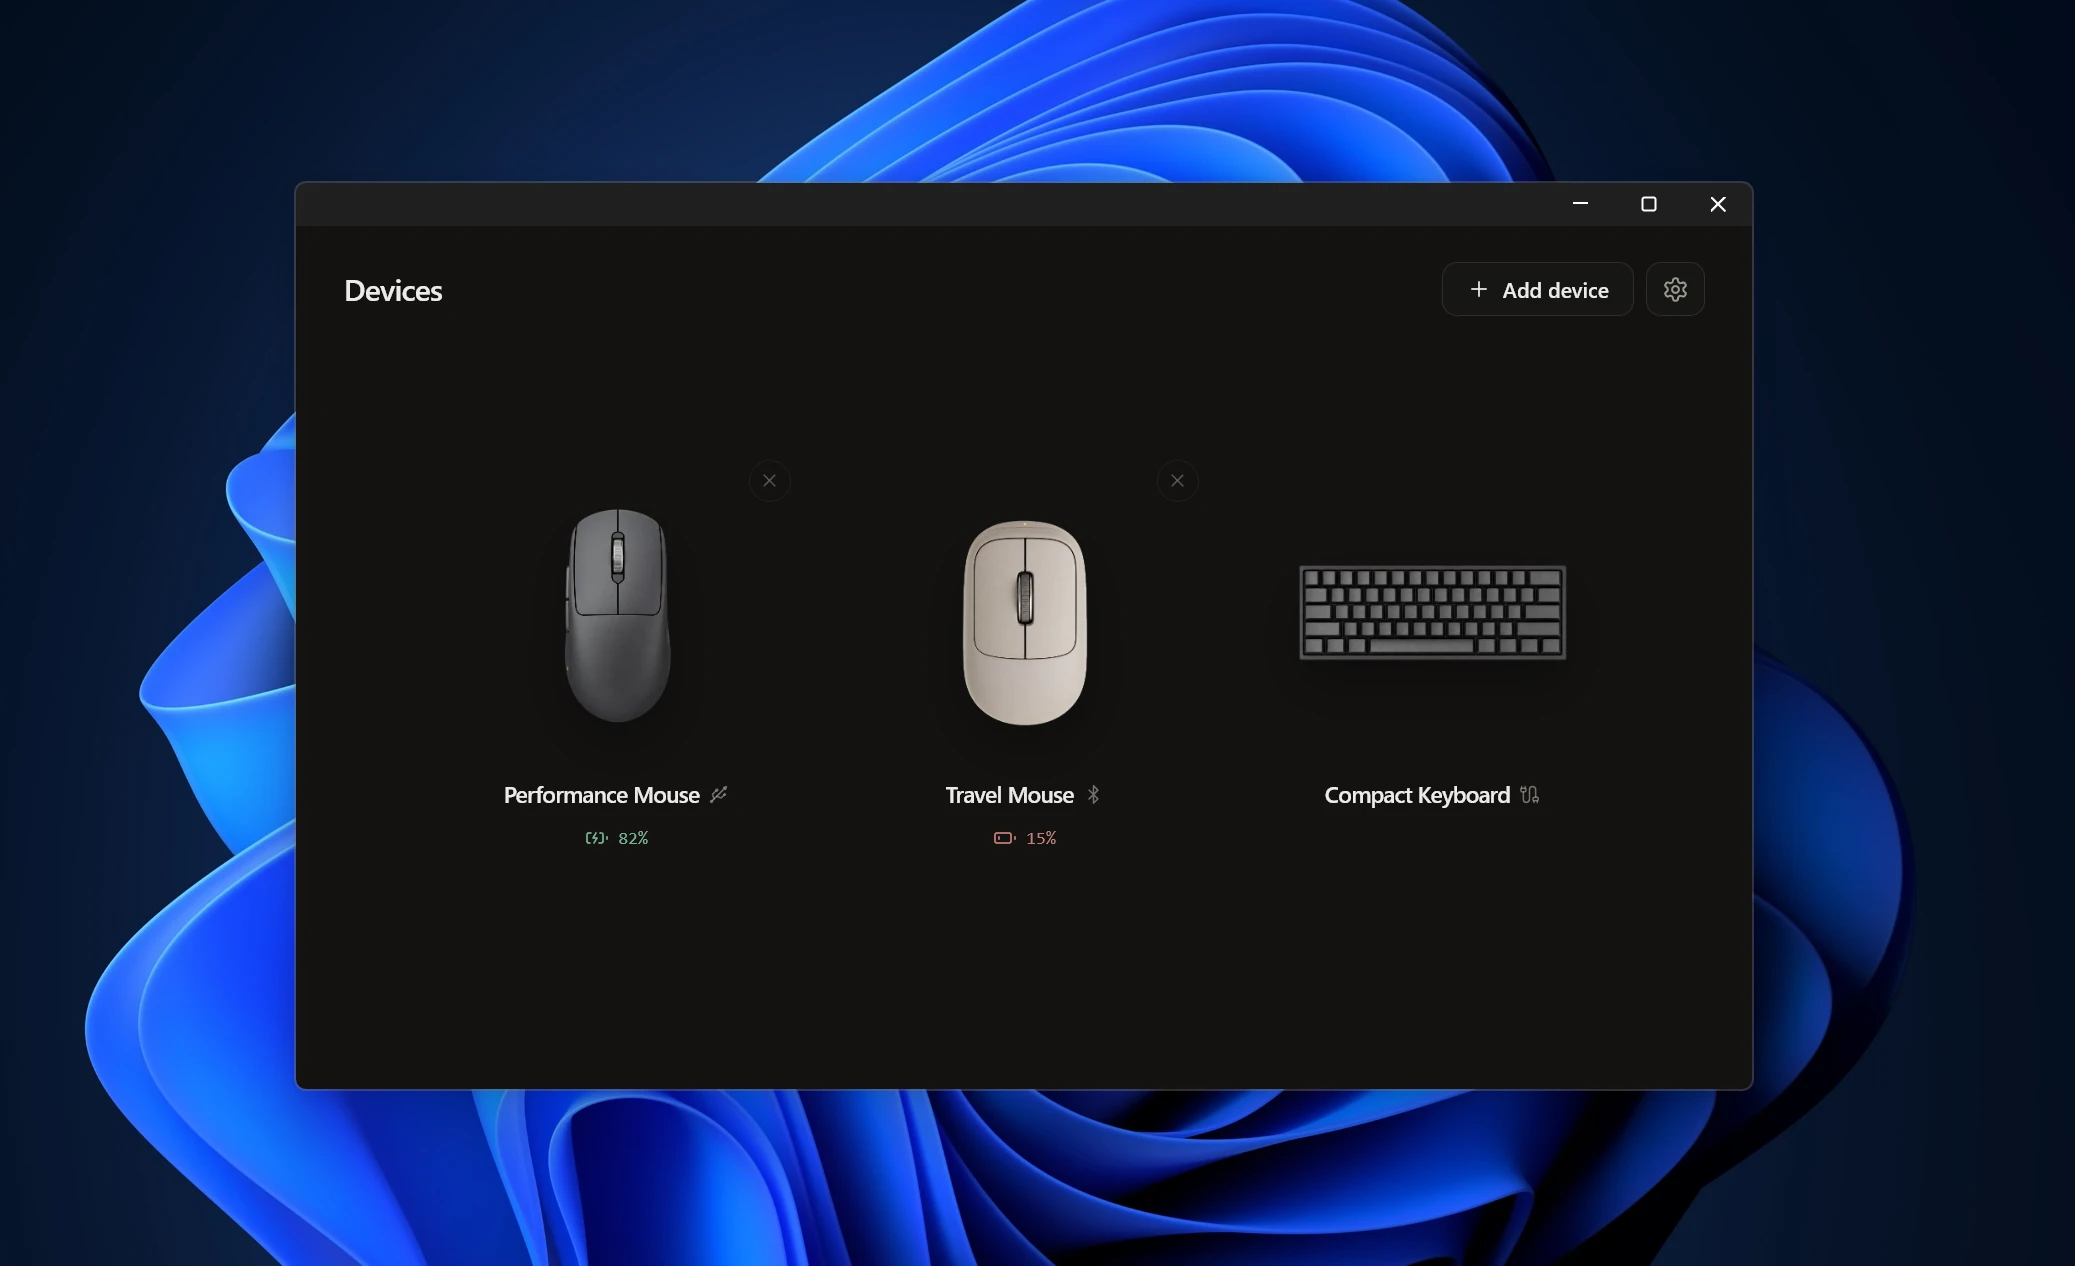
The device overview in MōDevice on Windows.
Every change applies immediately. When you assign an action to a mouse button, the button is highlighted on the device image; when you adjust the backlight, the keyboard picture reflects the new effect and color. Paired devices and their settings survive restarts. The app also covers the usual product surroundings: a light and dark theme, launch at login, update checks, and low-battery notifications.
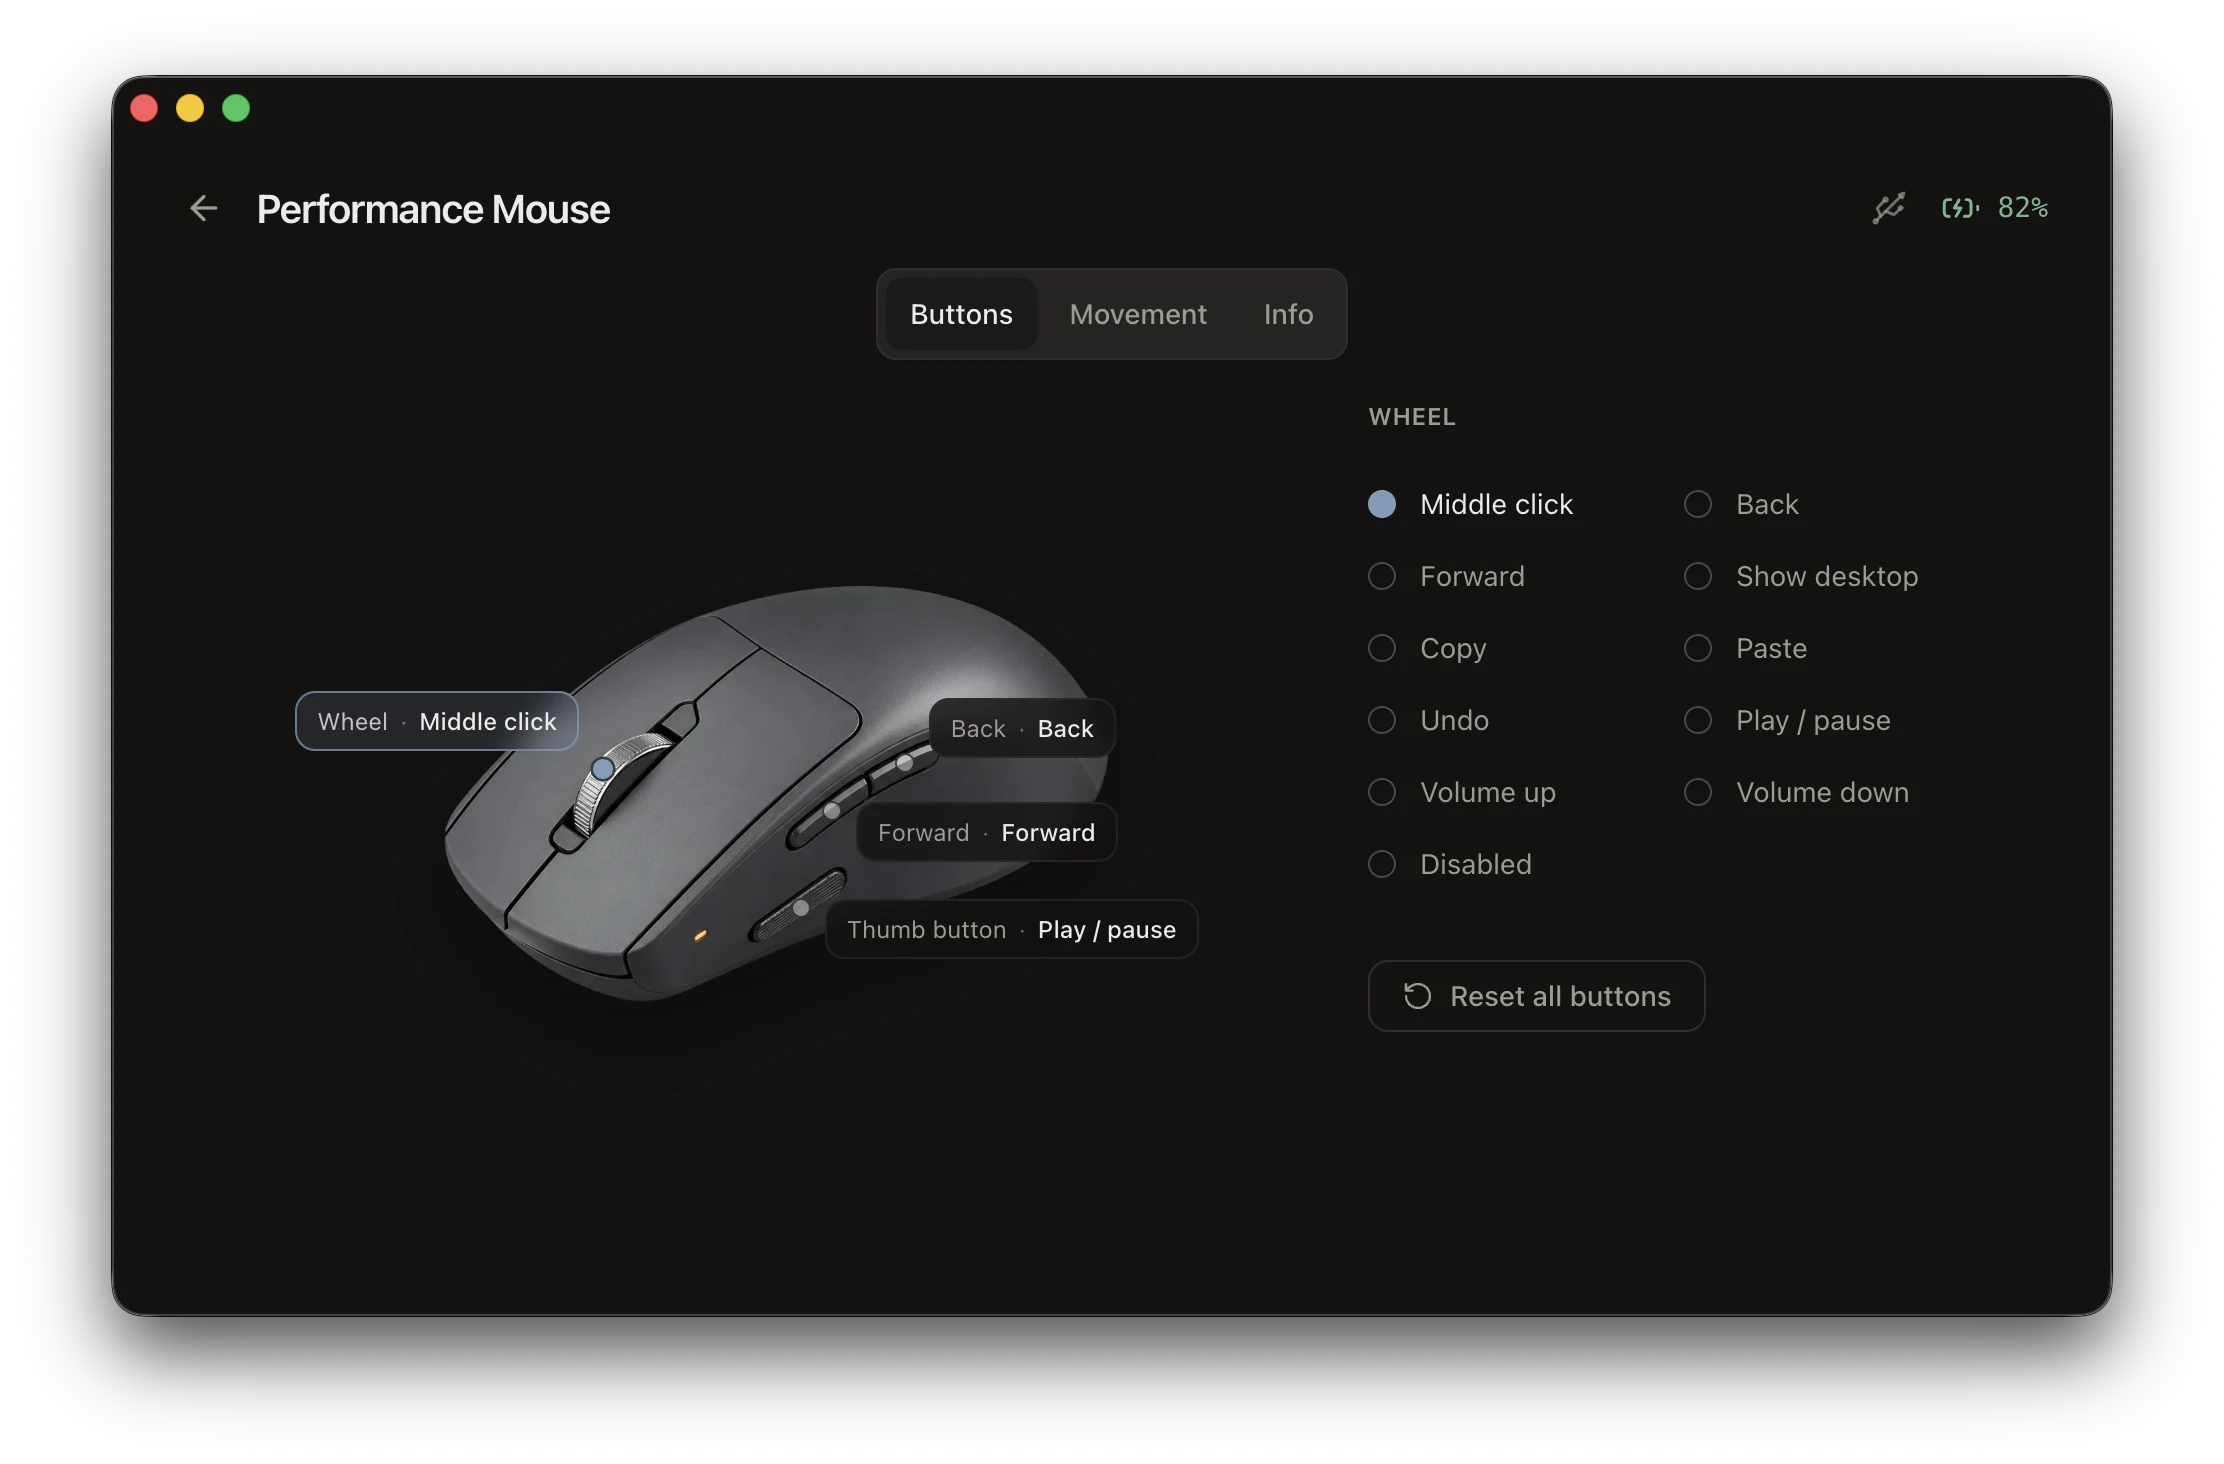
Assigning actions to mouse buttons.
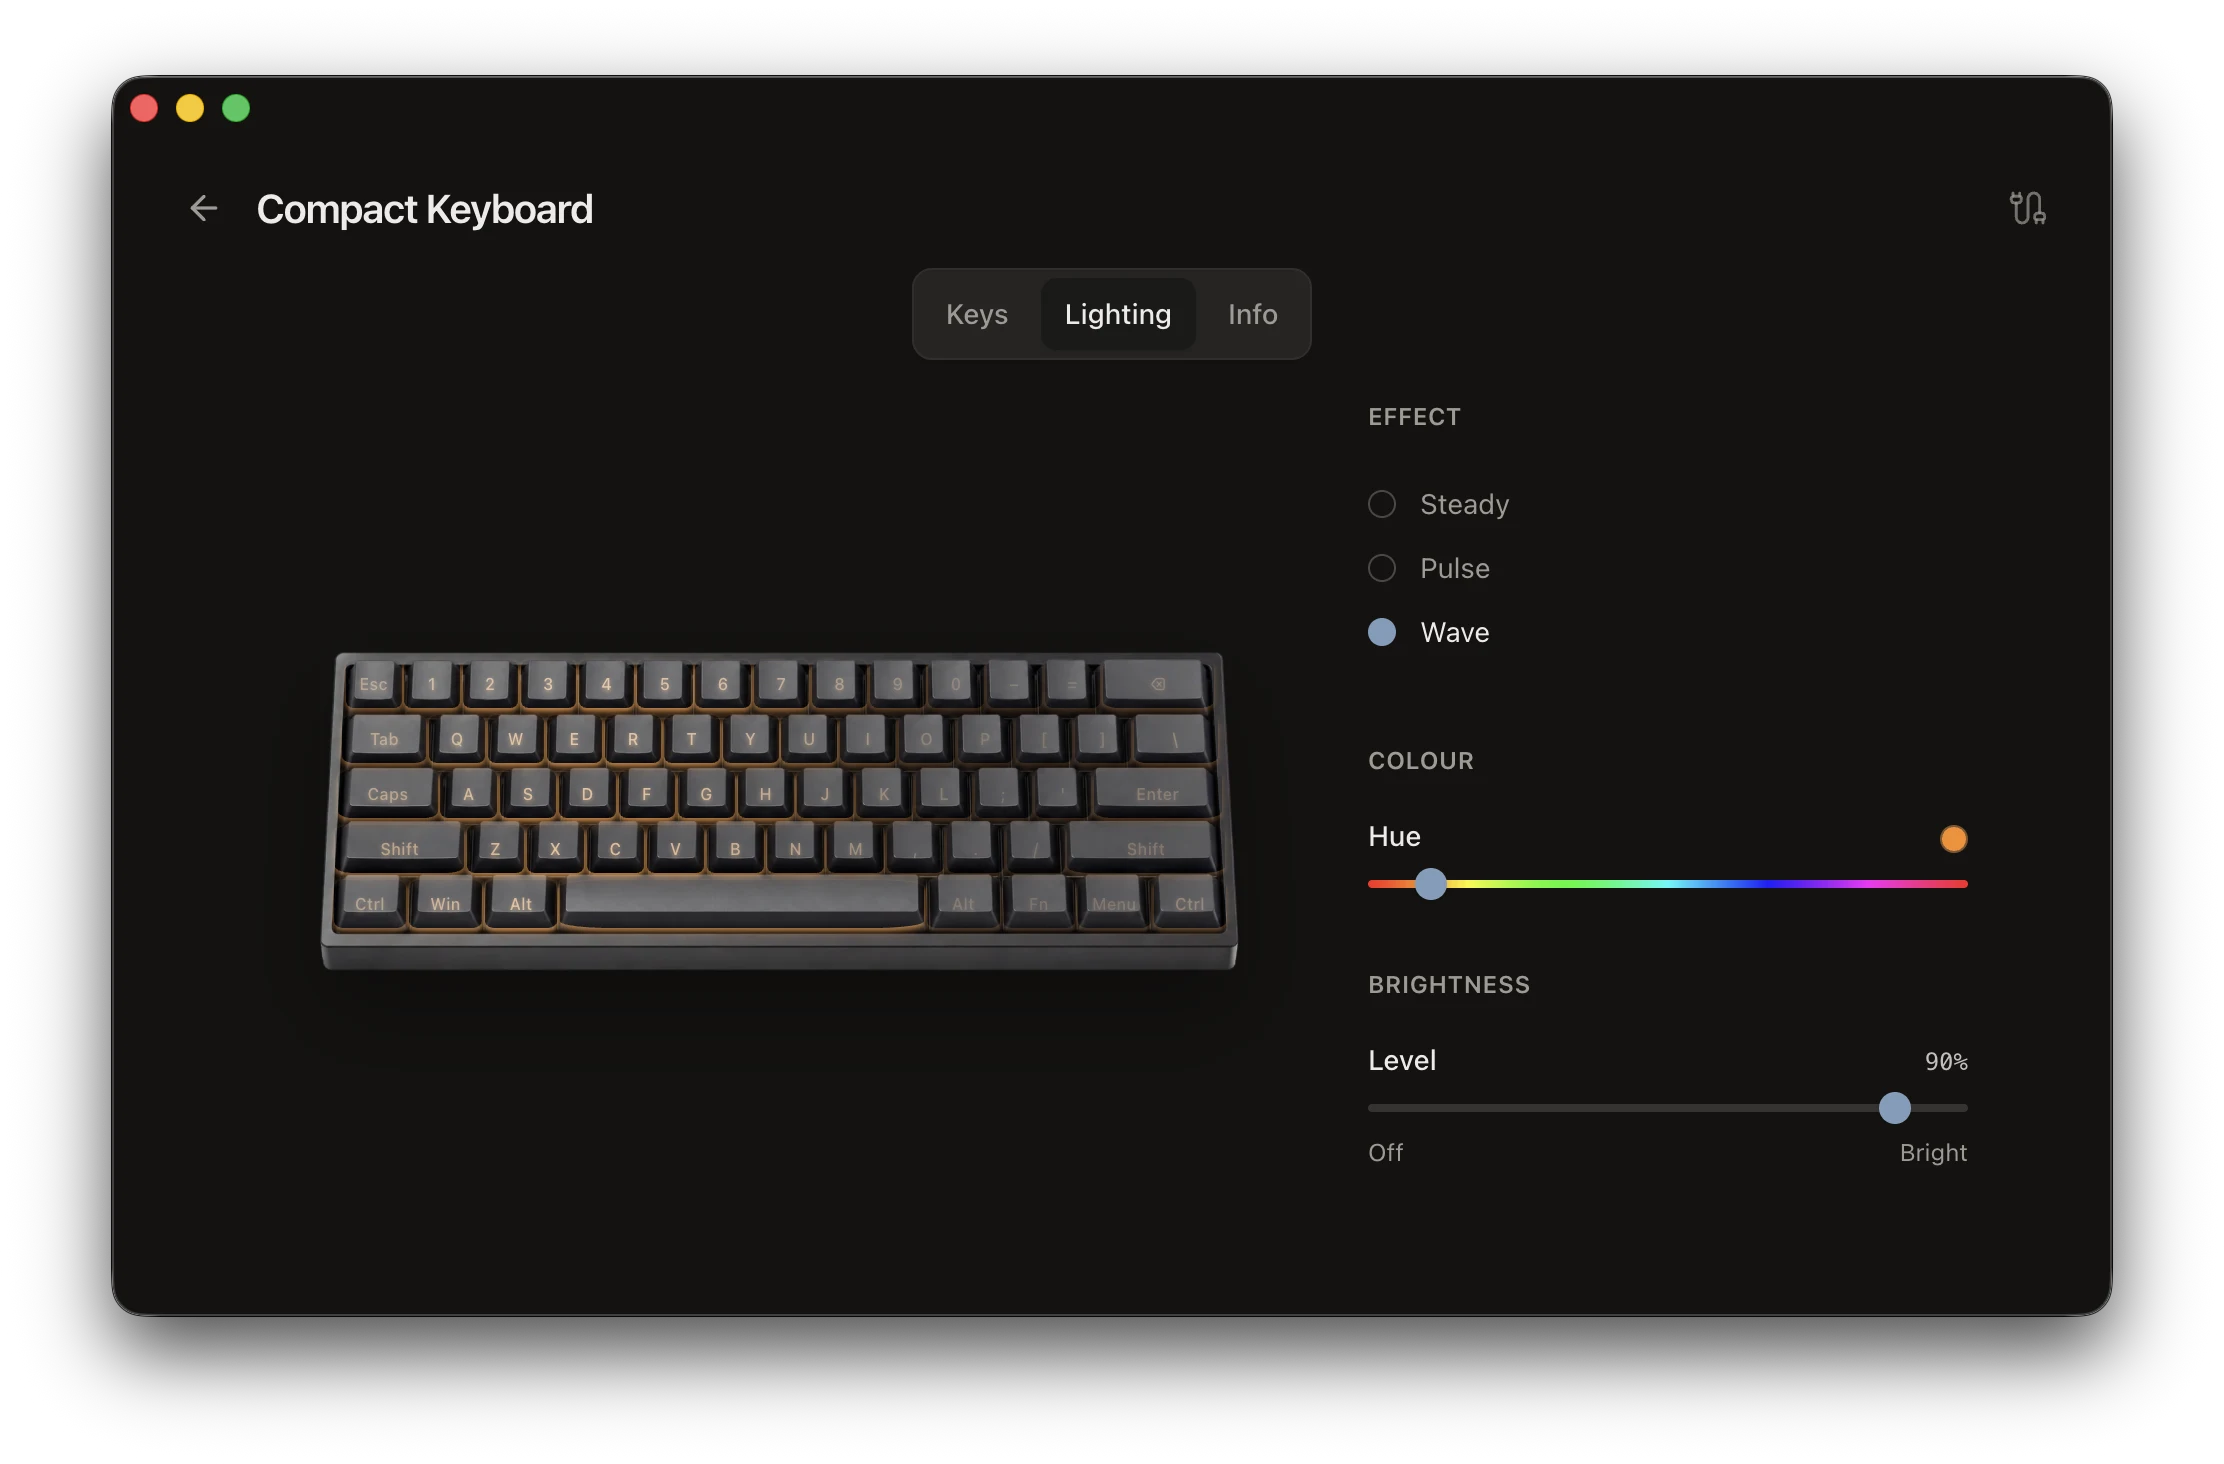
Configuring the keyboard backlight.
One thing MōDevice deliberately does not do is talk to real hardware. All devices are simulated by an in-memory C++ backend, so the demo runs on any machine without special peripherals. The simulation also marks the exact place in the code where calls to a real device SDK would go — we return to that spot later in the article.
The source code is published on GitHub under the MIT license, and the releases page offers signed builds for Windows and macOS. Before reusing the code, let’s see how it is organized.
Architecture
MōDevice is built with MōBrowser, a framework for building native cross-platform desktop applications with web technologies. A MōBrowser application runs as several operating system processes: a renderer process that displays the user interface, and a main process where Node.js runs the business logic. For low-level work, the framework loads an optional native C++ module into the main process. MōDevice uses all three, and each maps to one of the requirements from the beginning of the article:
src/renderer— the user interface: a React application that renders device screens, editors, and dialogs. It runs in a sandboxed renderer process with no direct access to the system.src/main— the TypeScript main process: it creates the window, persists paired devices and settings, checks for updates, and connects the interface to the native module.src/native— the C++ module: the device stack that stands in for real hardware and would talk to a vendor SDK or system APIs in a real product.
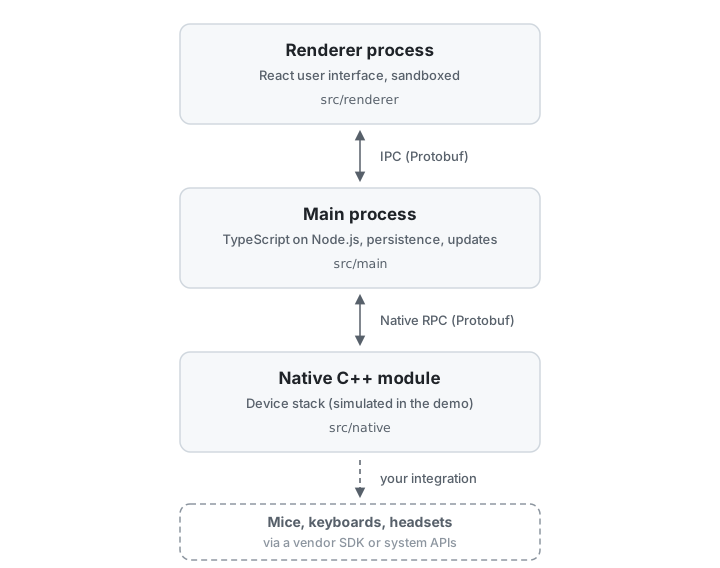
The three layers of MōDevice and the calls between them.
Typed contracts
The layers communicate through remote procedure calls, and the contracts between
them are defined in Protocol Buffers (Protobuf) files.
The devices.proto file describes devices, their settings, and
the operations the device stack supports:
service DeviceStackService {
  rpc List(google.protobuf.Empty) returns (DeviceList);
  rpc Discover(google.protobuf.Empty) returns (DeviceList);
  rpc Pair(DeviceId) returns (google.protobuf.Empty);
  rpc Forget(DeviceId) returns (google.protobuf.Empty);
  rpc GetSettings(DeviceId) returns (Settings);
  rpc ApplySettings(Settings) returns (google.protobuf.Empty);
}
When the project is built, MōBrowser generates matching TypeScript and C++ code from these files. There is no hand-written serialization anywhere in the app: if the C++ side changes a message and the TypeScript side falls behind, the project stops compiling instead of failing at runtime.
Following one click
The clearest way to see how the layers cooperate is to follow one user action from top to bottom. Suppose the user assigns a new action to a mouse button and the app commits the change.
The React editor hands the updated settings to the gateway module
(src/renderer/gateway/devices.ts), the single place where the interface talks
to the rest of the app. The gateway sends an IPC request from the sandboxed
renderer to the main process:
void ipc.devices.ApplySettings(nextSettings);
The main process (src/main/devices.ts) receives the request, forwards it to
the C++ module, and saves the snapshot so the settings survive the next launch:
async ApplySettings(request: IpcSettings) {
  await native.deviceStack.ApplySettings(request);
  storeSettings(request);
  return {};
}
In C++ (src/native/device_service.cc), the generated service implementation
receives a typed Protobuf message and passes it to the device stack — the class
that would write the change to the physical device:
void ApplySettings(const Settings* request,
                   Callback<Empty> done) override {
  if (!stack_.ApplySettings(*request)) {
    std::move(done).Reject("Cannot apply settings.");
    return;
  }
  std::move(done).Complete(Empty());
}
Three layers, three files, and each does one job: the renderer renders, the main process coordinates and persists, and the native module touches the hardware.
Changes flow back
Communication also works in the opposite direction. When the device list changes on the native side — for example, a wireless device is paired — the C++ stack calls a TypeScript service with the new device snapshot. The main process pushes the snapshot to a stream the renderer subscribes to, and React re-renders the device list. The interface stays in sync with the device state without polling loops in the UI code.
The sandboxing mentioned above is part of the security model: the renderer process cannot reach the file system or the devices directly. Every privileged operation goes through the main process, so the attack surface of the interface code stays small even though it is built with regular web technologies.
Connecting real hardware
Now back to the spot we promised to revisit. The entire simulation lives in one
class: DeviceStack, defined in src/native/device_stack.cc. Its methods
mirror the service contract shown above — list, discover, pair, forget, read
settings, apply settings. To connect real hardware, replace the bodies of these
methods with calls to your device SDK or system APIs and keep the interface from
device_stack.h if its operations fit your integration. The main process and
the React interface stay as they are: they only see the contract.
One decision to make early is where the settings live. The demo saves paired
device IDs and settings on disk in src/main/devices.ts and replays them into
the device stack on startup. If your devices store settings in onboard memory,
or your SDK already persists them, remove this duplicate persistence and keep
a single source of truth.
The demo is also arranged for growth. Each device reports its own controls and value ranges — the buttons a mouse has, the DPI range it supports, whether a keyboard has a backlight — so supporting another mouse or keyboard model mostly means returning a new description from the device stack and adding the product artwork. A new device category, such as a headset, gets its own capabilities and settings in the Protobuf files, its own editor component, and its own artwork, while the shared device screen keeps handling layout and navigation.
Try it yourself
The quickest way to get a feel for MōDevice is the video below: it walks through pairing a mouse, remapping its buttons, and changing the keyboard backlight.
To run the app from source, you need Node.js 20.20.2, 22.22.2, or 24.14.1 and later on macOS 14 or later with Apple silicon, or on Windows 10 or later:
git clone https://github.com/mo-browser-apps/device
cd device
npm install
npm run dev
npm run build command
Wrapping up
For the person unpacking a new mouse or keyboard, the companion app is part of the product. For the company shipping that product, it is a software project with an unusual mix of requirements: an interactive interface, low-level access to the hardware, and a single codebase that serves both Windows and macOS.
MōDevice shows one way to meet that mix: a React interface, a TypeScript main process, and a native C++ module, connected by typed Protobuf contracts. The hardware-specific part is isolated in one class, so replacing the simulation with a real vendor SDK does not disturb the rest of the application.
The source code is MIT-licensed — use it as a base for your own device configuration software. To learn more about the framework behind it, visit the MōBrowser website.